June
BotCity Orchestrator
New Schedule
In our quest to simplify our users' experience in creating and maintaining schedules, we present the new improvements to the Schedule feature.
In addition to making it more user-friendly, our goal is also to address the needs identified through surveys and feedback from our community. With an intuitive interface and clearer options, you'll have more control and flexibility to schedule your tasks, thus enhancing your experience using BotCity.
This feature is available for use during the trial period and enterprise plans.
What can be done with the "New Schedule"?
With the improvements made to the schedule feature, you can:
- Create schedules in two ways: cron or calendar.
- View created schedules and their status.
- Edit existing schedules.
- Delete schedules that are no longer needed.
Cron Schedules vs. Calendar Schedules
To make scheduling simpler, it is now possible to choose how to create a schedule on the platform:
- Via Cron: For users already familiar with using cron and who want to create more complex scheduling rules involving days, months, and mixed intervals.
- Via Calendar: For users new to the platform who want to create less complex schedules, involving intervals of days, hours, weeks, or months.
Creating Schedules
To create a schedule, two steps are necessary. To get started, just click on the "Create Schedule" button:
- Step 1 - Automation: In this step, you select the automation for which you want to create the schedule, give it a name, and configure the desired parameters.
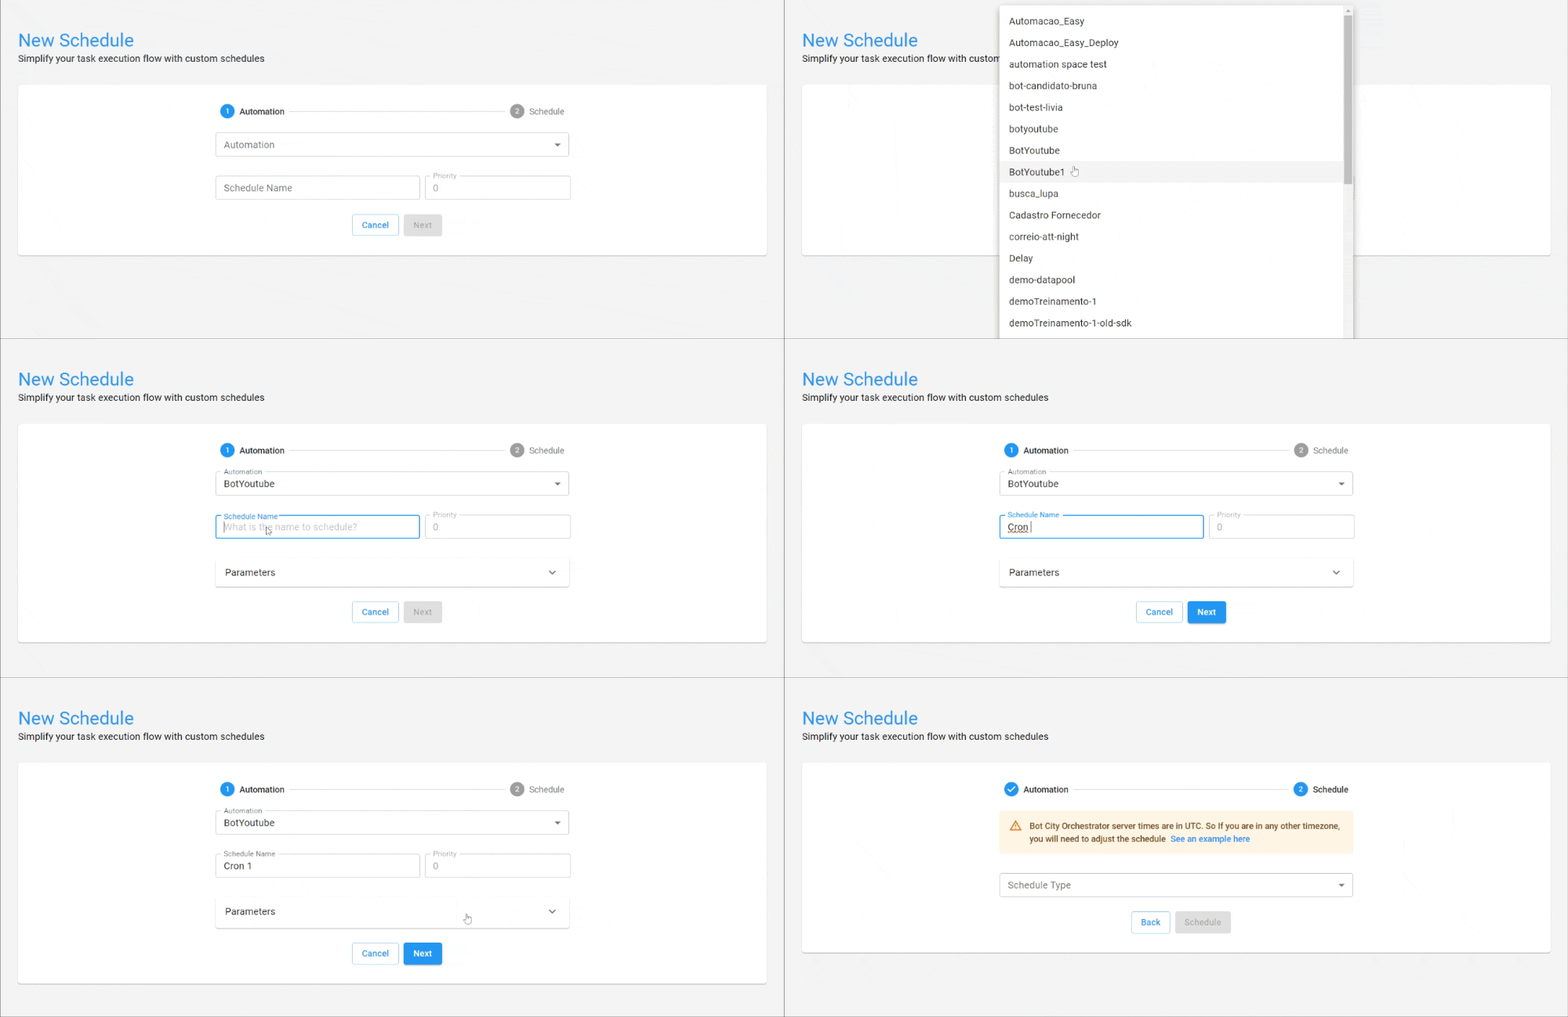
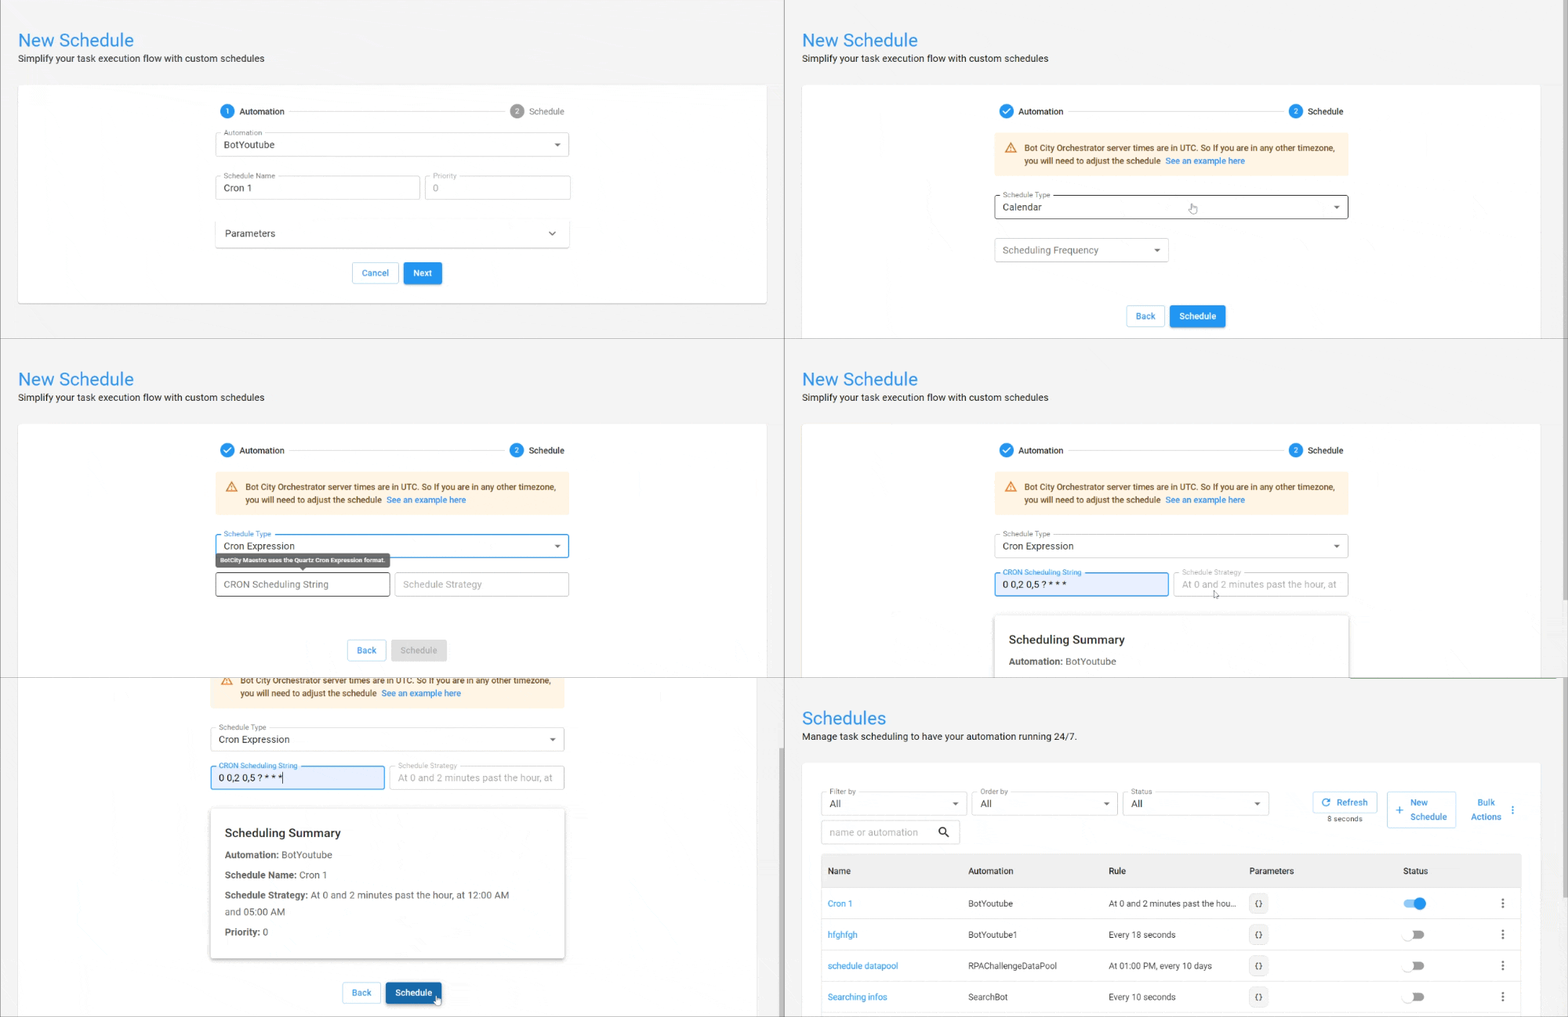
Step 2 - Schedule: In the Schedule type field, you need to choose whether you want to create a cron expression schedule or a calendar schedule.
If you choose to use the Cron expression option, you should input the expression according to the rule you want to use, and that's it, the schedule will be created!
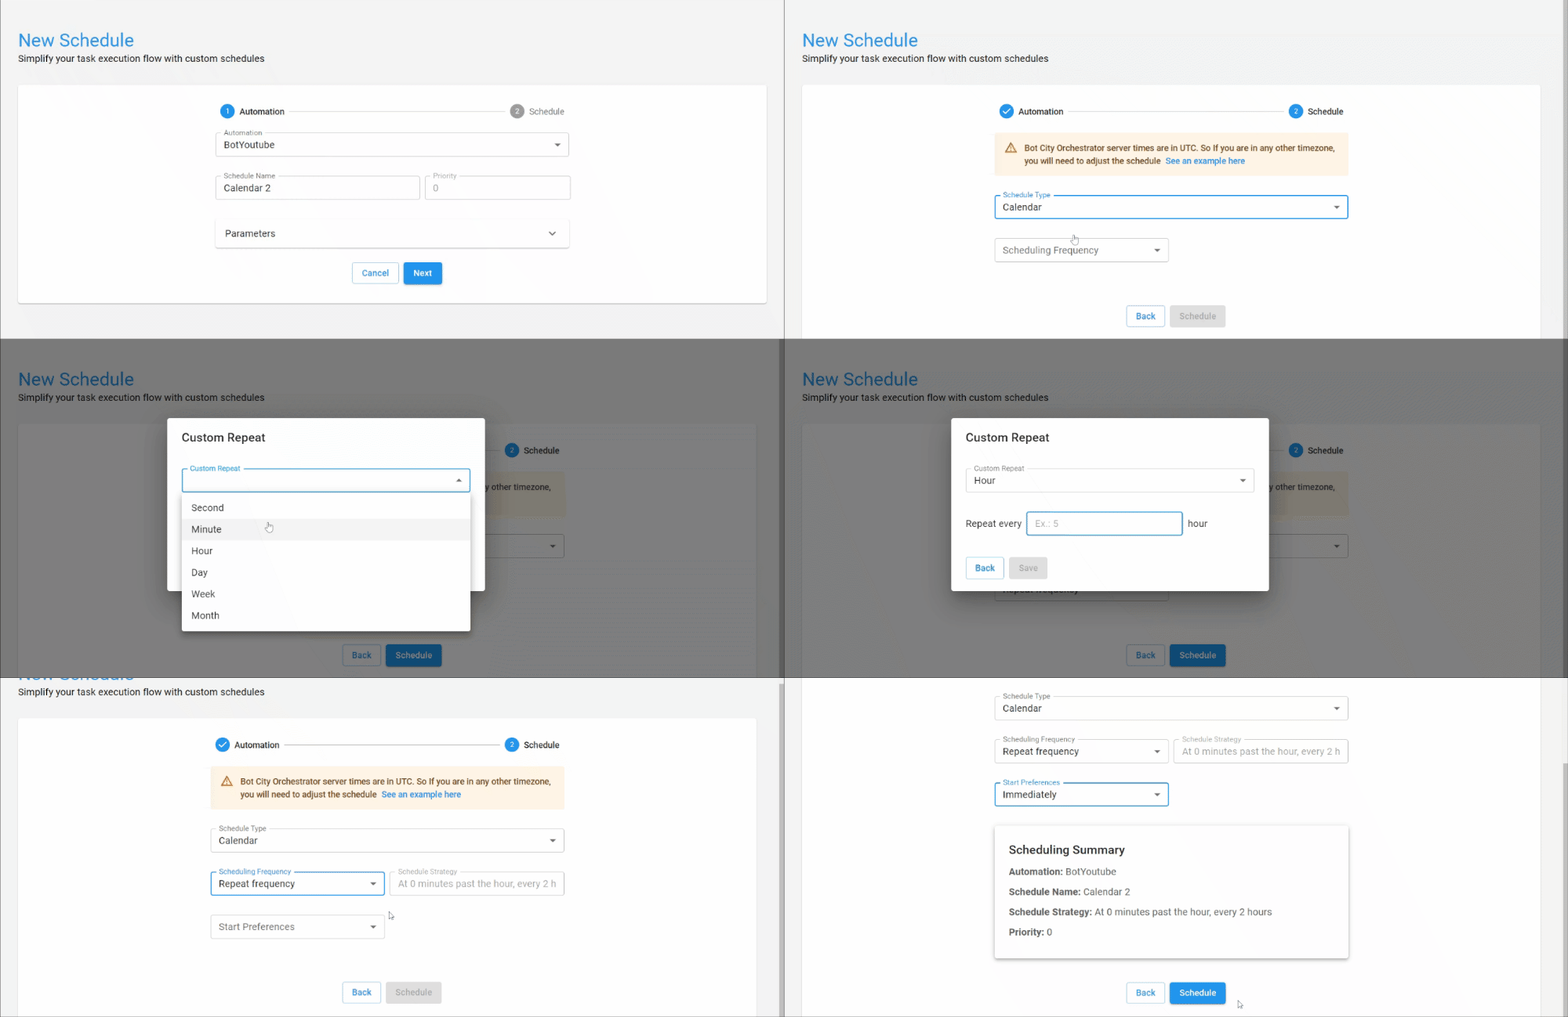
If you choose to use the calendar option, you must select how frequently you want the schedules to repeat. By selecting the repeat frequency option, you can choose to create a scheduling rule for every:
- Second
- Hour
- Day
- Week
- Month
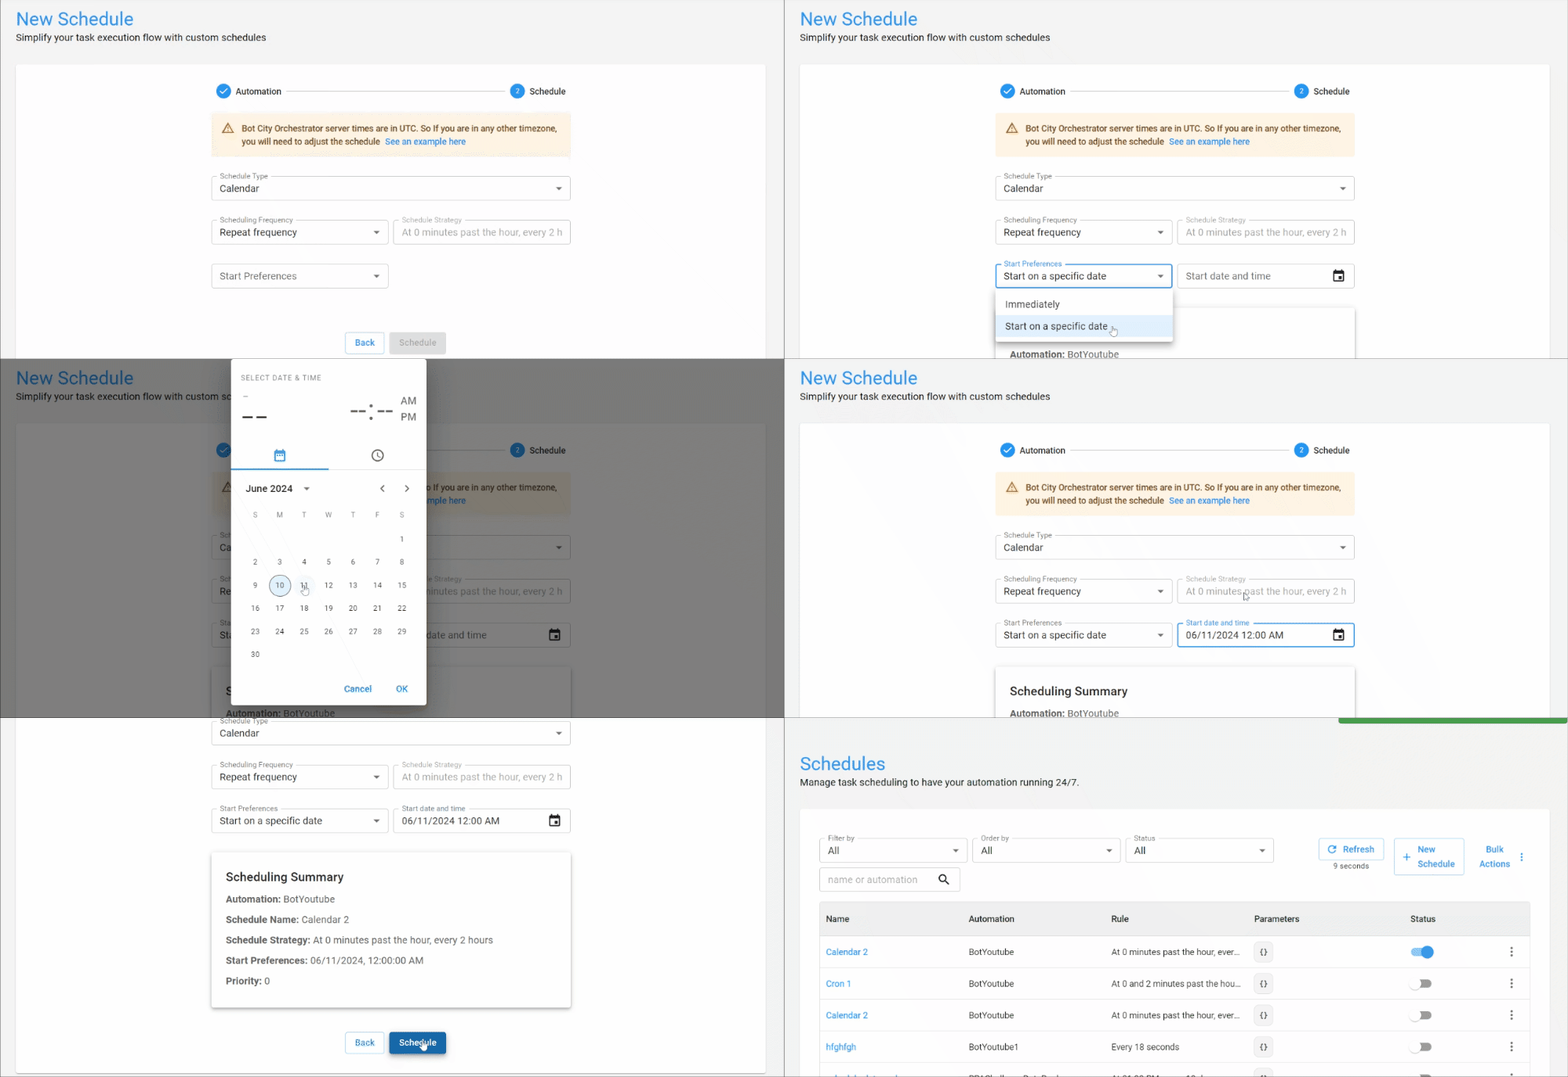
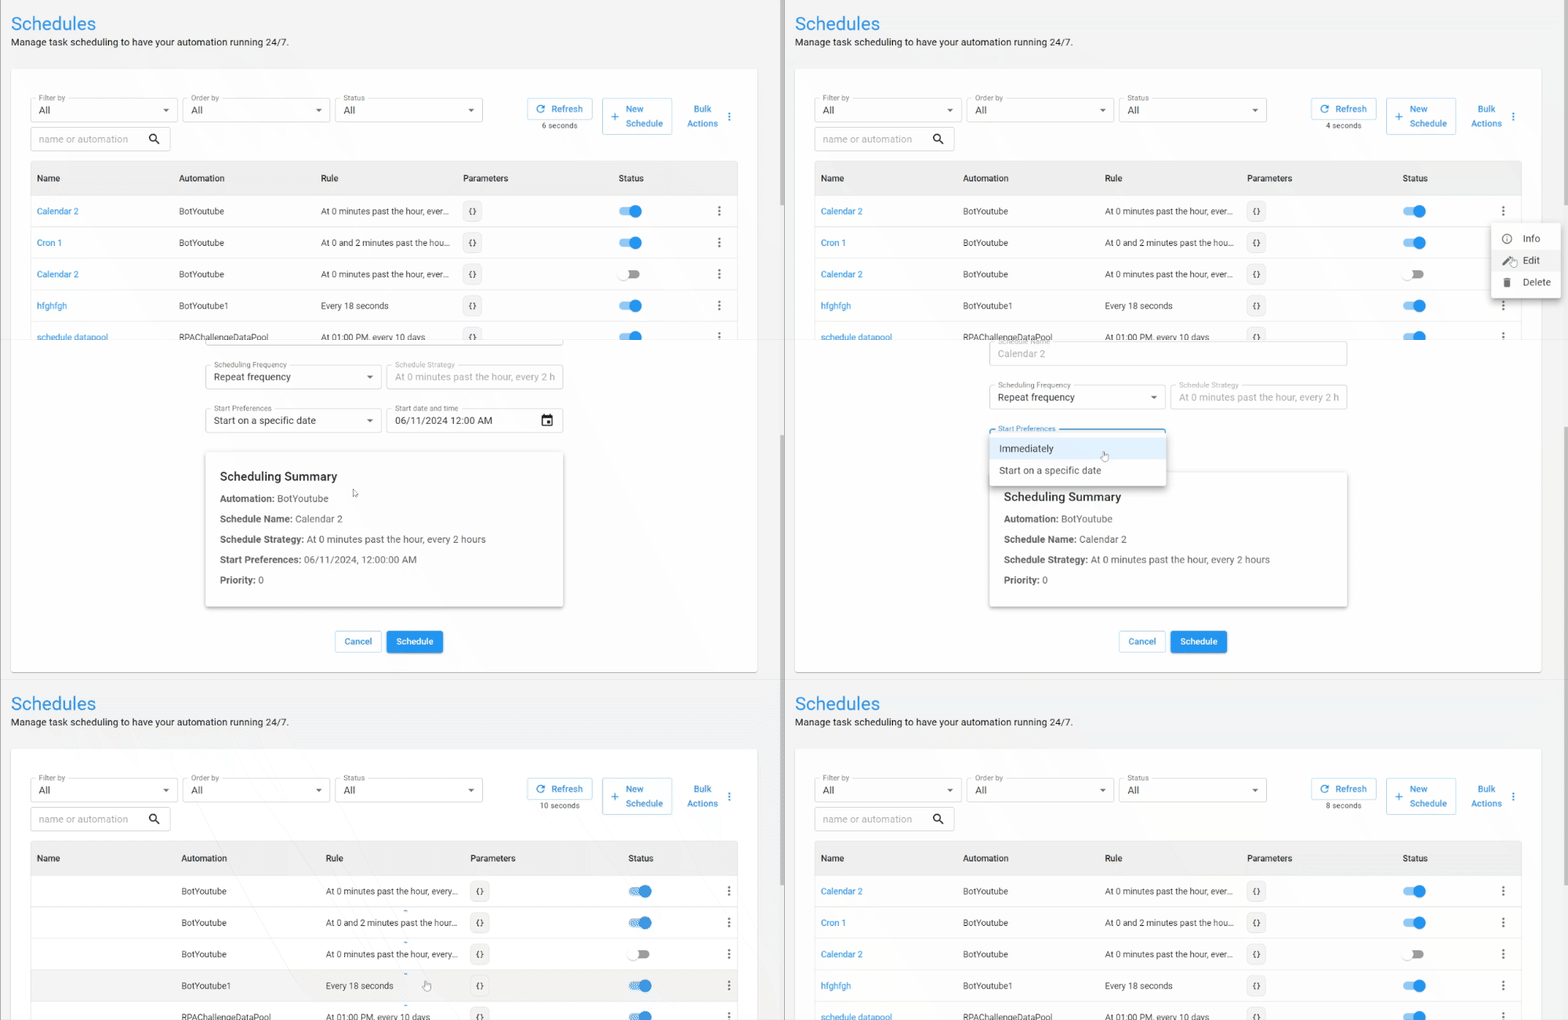
Additionally, it is possible to program whether a schedule should start immediately or at a specific date and time.
View, Edit, and Delete Schedules
The list of created schedules has also received some updates! Now you can:
- Search for created schedules using filters
- Change the status of a schedule to
activeorinactive - Edit the rule of an existing schedule
- View schedule information
- Delete a created schedule
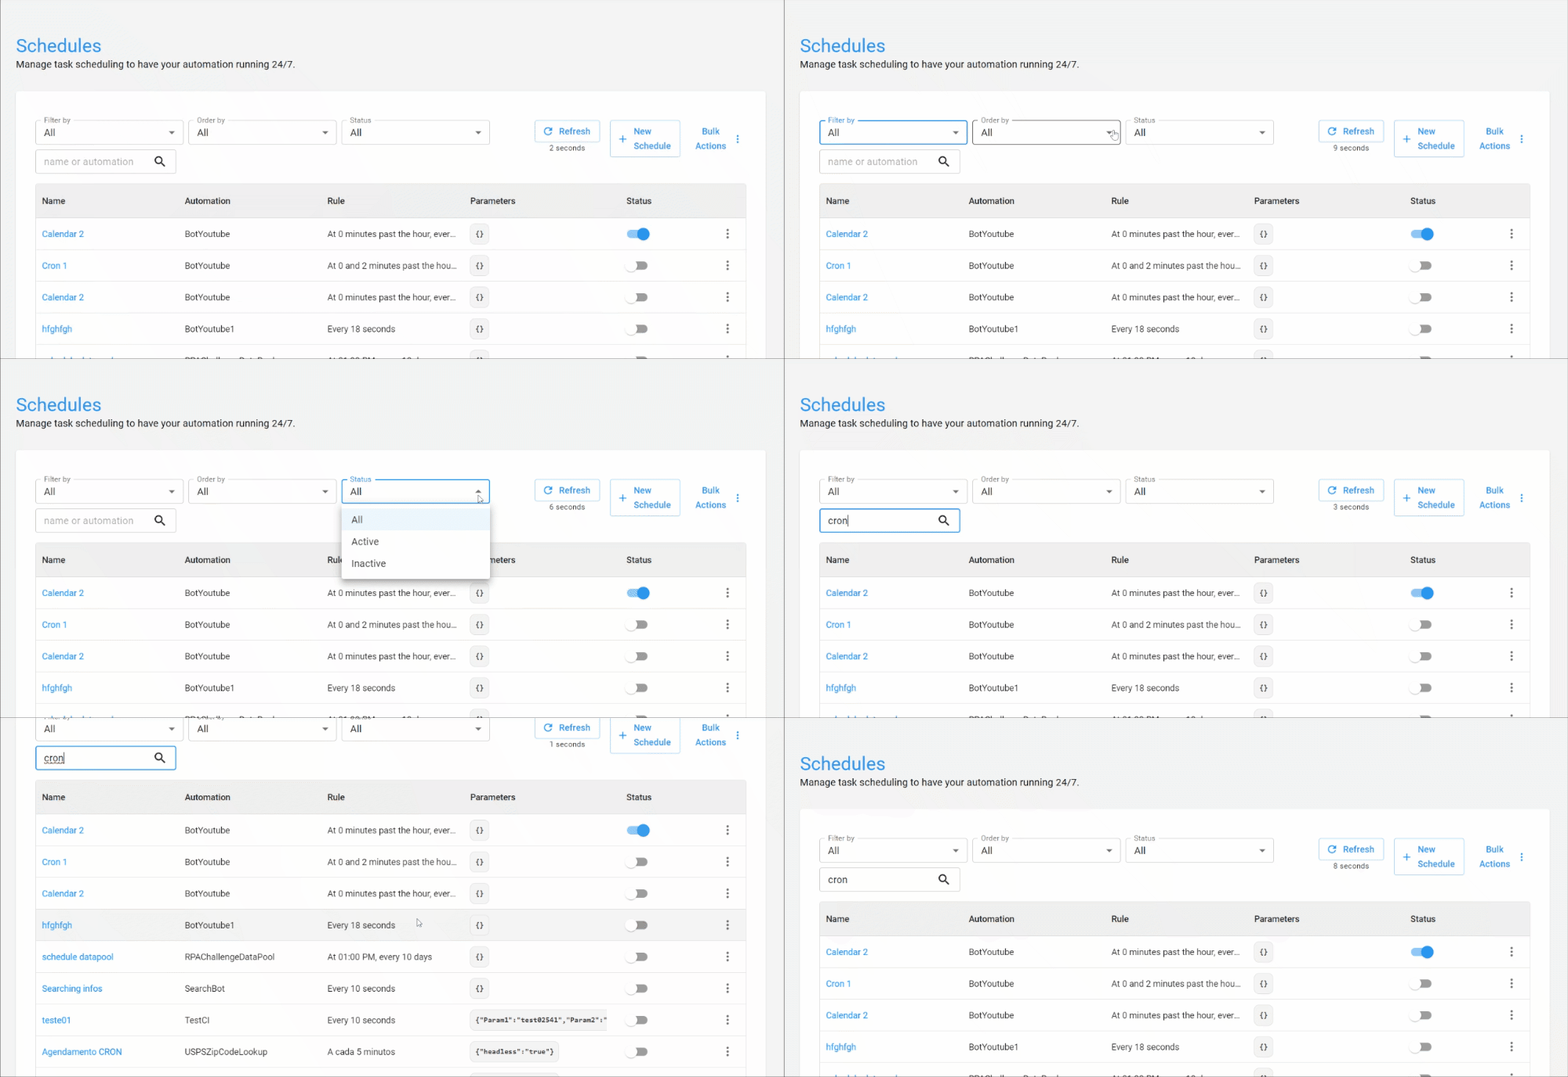
You can filter by automation or name and sort schedules from the most recent to the oldest and vice versa, as well as filter by status.
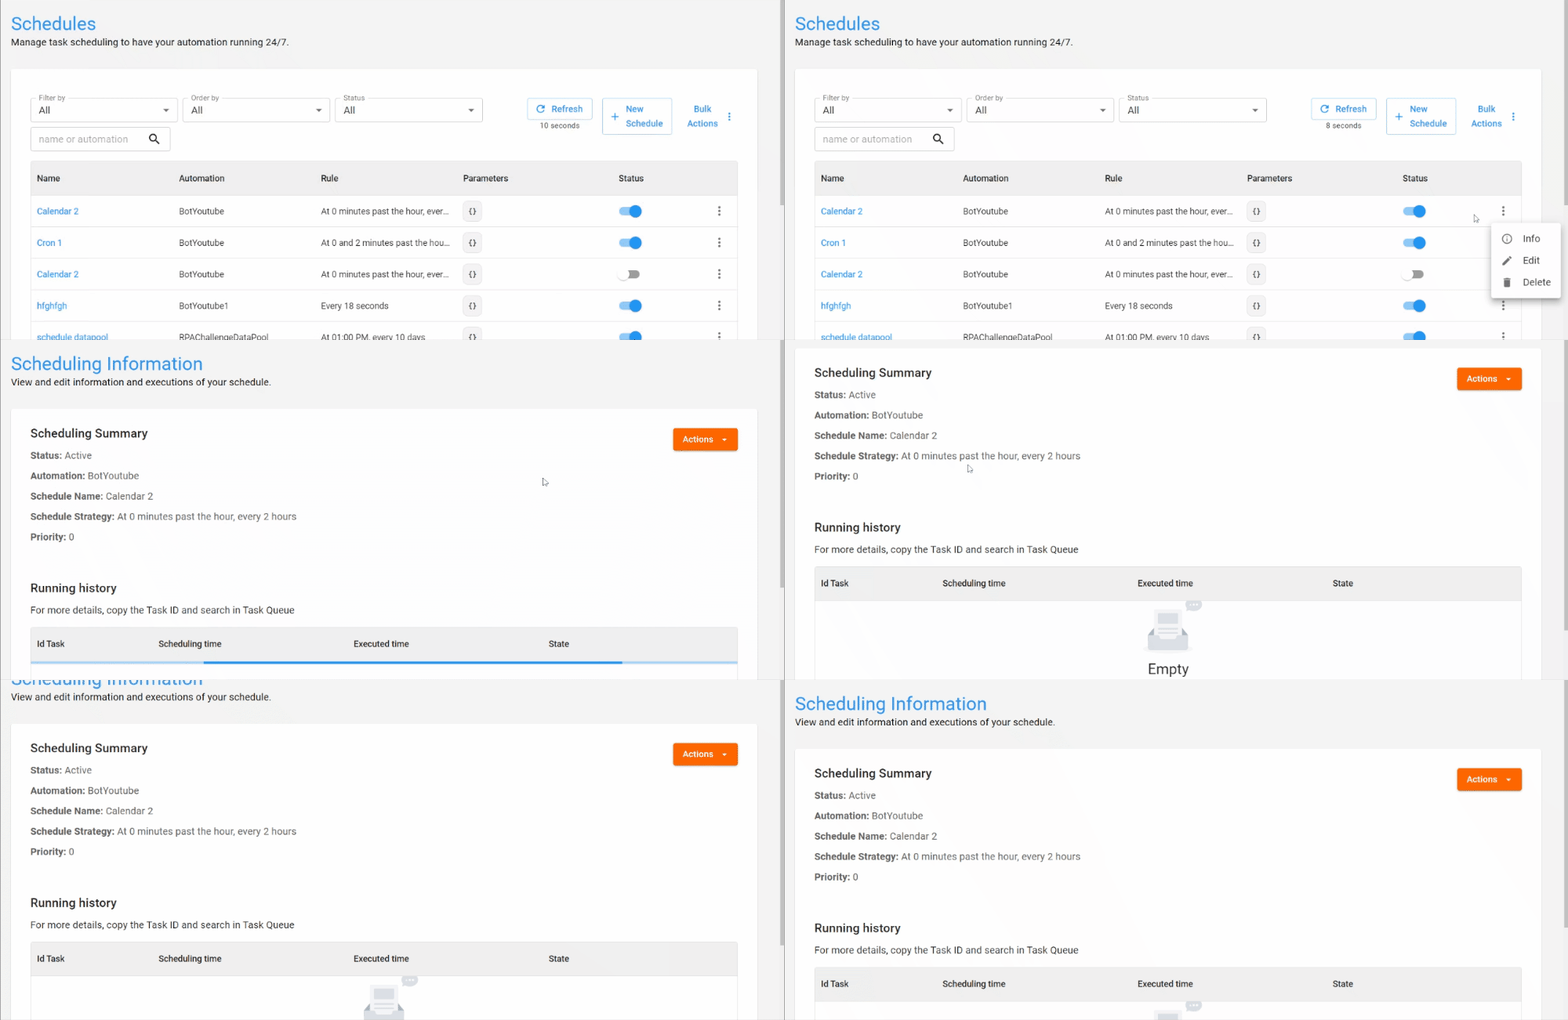
With the info action, you can view a summary of the schedule and see which tasks were created based on this scheduling rule.
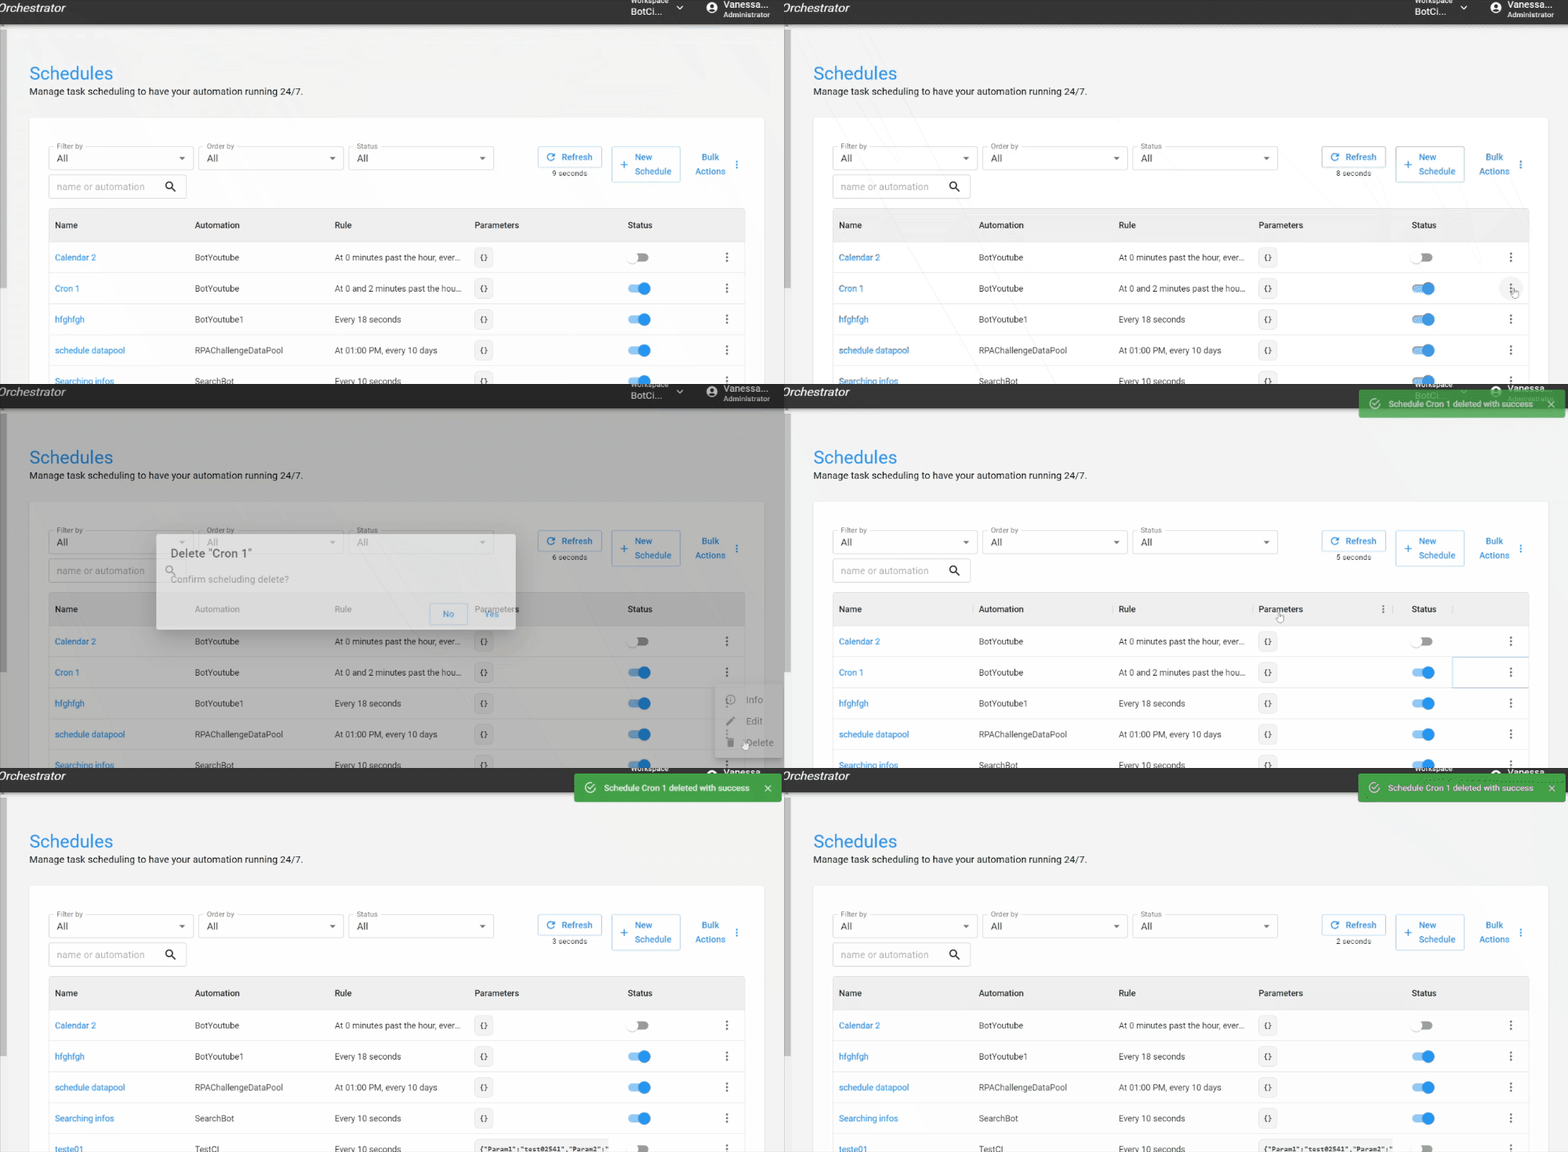
Through the edit action, you can modify an existing rule, and if a scheduling rule is no longer needed, you can delete it from your list.
To check out the step-by-step guide for each scheduling mode and to address any questions you might have, you can refer to our documentation at this link.