Web Automations and Captchas
Finding different types of captcha during a process is a common situation when we are developing Web automations.
They can present different complexities, making it necessary to use different alternatives to solve each case.
This guide will demonstrate the existing alternatives and the easiest ways to solve different types of captcha in Web automations.
Captcha Solving Services
Currently, there are several services for solving captchas, usually these services offer an API and also an extension to be used in the browser.
The BotCity Captcha plugin currently supports AntiCaptcha and DeathByCaptcha services, the plugin is based on using the API of these services and is just a way to facilitate the integration with your bot.
If you have an account on another service, it is also possible to integrate with your bot. Just use the code referring to this service instead of using the plugin.
In the following examples, we will use the AntiCaptcha service and demonstrate how we can use the API or browser extension to solve captchas.
When to use API or Browser Extension?
As mentioned above, most captcha solving services offer in addition to an API, an extension to be used in the browser.
Below we list the pros and cons of each alternative:
API
-
Pros:
- Usually the resolution is done faster
- No browser setup required, just make the API calls
- Works normally with or without headless mode
- Best alternative to Image Captchas
-
Cons:
- Some limitations to validate invisible captchas (hCaptcha or reCaptcha)
- Captchas that use a callback function can cause problems when injecting the response into the page
Browser Extension
-
Pros:
- Identifies and solves the captcha automatically
- Solves the captcha in a more "human" way, it is more difficult to be blocked by the page
- Best alternative to captchas that use a callback function
-
Cons:
- Captcha resolution may take a while in some cases
- In some cases it may not work in headless mode (Chrome limitation)
Solving Captchas using API
The resolution of captchas using the API will basically be divided into two steps.
The first step is to collect some information from the page and make the request. The second step is to inject the response that was returned into the page.
reCaptcha and hCaptcha
To solve these types of captcha, we will usually always need the data-sitekey property of the page.
In most cases, you can see the element that contains this property when you inspect the page.
Once the API solves the captcha, we'll insert the response token into the page.
Normally, this response will be injected into the g-recaptcha-response element.
from botcity.web import WebBot
from botcity.plugins.captcha import BotAntiCaptchaPlugin
def main():
bot = WebBot()
bot.headless = False
bot.driver_path = r"<chromedriver path>"
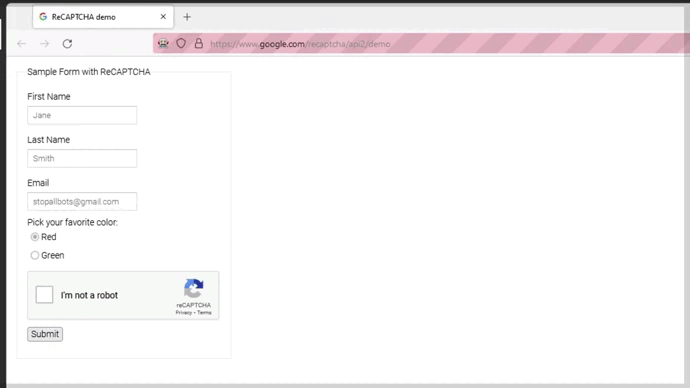
url = "https://www.google.com/recaptcha/api2/demo"
# Opens the website.
bot.browse(url)
# Find element with data-sitekey
captcha_id = bot.find_element('.g-recaptcha').get_attribute('data-sitekey')
# Using plugin with your AntiCaptcha api key
anti_captcha = BotAntiCaptchaPlugin("<API_KEY>")
# Solving Captcha
response = anti_captcha.solve_re(url, captcha_id)
# Inserting response in the recaptcha component of the page
bot.execute_javascript('document.getElementById("g-recaptcha-response").innerHTML = "%s"' % response)
# Clicking the submit button
submit = bot.find_element("#recaptcha-demo-submit")
submit.click()
# Verifying that the resolution worked
assert bot.find_element(".recaptcha-success")
print("Success!")
# Stop the browser and clean up
bot.wait(3000)
bot.stop_browser()
if __name__ == '__main__':
main()
Important
Generally, the used elements always appear with these names: data-sitekey and g-recaptcha-response.
Pay attention that the page you are automating also uses this pattern.
Image Captcha
To solve an image Captcha, we first have to save the .png of the image.
When the API returns the result, we'll insert it into the page's response input.
from botcity.web import WebBot, By
from botcity.plugins.captcha import BotAntiCaptchaPlugin


def main():
    bot = WebBot()

    bot.headless = False
    bot.driver_path = r"<chromedriver path>"

    # Opens the website
    bot.browse("https://democaptcha.com/demo-form-eng/image.html")

    bot.find_element("message", By.NAME).send_keys("Solving captcha!")

    # Saving captcha image
    captcha_img = bot.find_element("htest_image", By.ID)
    captcha_img.screenshot("captcha.png")

    # Using plugin with your AntiCaptcha api key
    anti_captcha = BotAntiCaptchaPlugin("<API_KEY>")

    # Solving Captcha
    response = anti_captcha.solve_text("captcha.png")

    # Inserting response in the input
    captcha_input = bot.find_element("vericode", By.ID)
    captcha_input.send_keys(response)
    bot.wait(2000)

    # Clicking to check captcha
    btn_send = bot.find_element("btn.btn-install", By.CLASS_NAME)
    btn_send.click()

    # Stop the browser and clean up
    bot.wait(5000)
    bot.stop_browser()

def not_found(label):
    print(f"Element not found: {label}")

if __name__ == '__main__':
    main()
Tip
Usually the browser extension does not identify this type of captcha automatically, so using the API is the best alternative to solve Image Captchas.
Solving Captchas using Browser Extension
In the case of the AntiCaptcha service, in addition to using the API, it is also possible to use a browser extension to solve captchas automatically.
All we need is to load the extension and send a message to the browser to set the api key.
Using the AntiCaptcha Extension with Chrome
The first step is to download the .crx extension from the link provided by the AntiCaptcha documentation.
Warning
To be able to correctly download the .crx file and avoid blockages, AntiCaptcha recommends using some settings.
See more details at this link.
With the file downloaded, let's insert the following configuration into the automation code:
from botcity.web import WebBot, By
from botcity.web.browsers.chrome import default_options
import json


def main():
    bot = WebBot()

    bot.headless = False
    bot.driver_path = r"<chromedriver path>"

    # Loading the .crx extension
    def_options = default_options()
    def_options.add_extension('anticaptcha-plugin_v0.63.crx')
    bot.options = def_options

    # Opens the website
    bot.browse("https://www.google.com/recaptcha/api2/demo")
    bot.wait(1000)

    # Configuration that will be passed to the extension, adjust for your api key
    message = {
        'receiver': 'antiCaptchaPlugin',
        'type': 'setOptions',
        'options': {'antiCaptchaApiKey': '<API_KEY>'}
    }
    # Run JS code in the web page context and perform a postMessage
    bot.driver.execute_script("""
        return window.postMessage({});
        """.format(json.dumps(message))
    )

    # Refreshing the page to update the configuration
    bot.wait(2000)
    bot.refresh()

    # Checking result, waits for the "Solved" message
    if bot.find_element('.antigate_solver.solved', By.CSS_SELECTOR, waiting_time=180000):
        submit = bot.find_element("#recaptcha-demo-submit")
        submit.click()

    # Stop the browser and clean up
    bot.wait(3000)
    bot.stop_browser()

def not_found(label):
    print(f"Element not found: {label}")

if __name__ == '__main__':
    main()
Info
Using Chrome, it is also possible to perform this configuration manually using the .zip format of the extension instead of the .crx file.
See more details on how to use the extension in .zip format at this link.
Using the AntiCaptcha Extension with Firefox
Using Firefox, the configuration we need to do in the browser is the same as when using Chrome. The only difference is that we will use the extension in .xpi format.
You can download the .xpi file from the link provided by the AntiCaptcha documentation.
from botcity.web import WebBot, Browser, By
import json


def main():
    bot = WebBot()

    bot.headless = False
    bot.browser = Browser.FIREFOX
    bot.driver_path = r"<geckodriver path>"

    # Loading the .xpi extension
    bot.install_firefox_extension("anticaptcha-plugin_v0.60.xpi")

    # Opens the website
    bot.browse("https://www.google.com/recaptcha/api2/demo")
    bot.wait(1000)

    # Configuration that will be passed to the extension, adjust for your api key
    message = {
        'receiver': 'antiCaptchaPlugin',
        'type': 'setOptions',
        'options': {'antiCaptchaApiKey': '<API_KEY>'}
    }
    # Run JS code in the web page context and perform a postMessage
    bot.driver.execute_script("""
        return window.postMessage({});
        """.format(json.dumps(message))
    )

    # Refreshing the page to update the configuration
    bot.wait(2000)
    bot.refresh()

    # Checking result, waits for the "Solved" message
    if bot.find_element('.antigate_solver.solved', By.CSS_SELECTOR, waiting_time=180000):
        submit = bot.find_element("#recaptcha-demo-submit")
        submit.click()

    # Stop the browser and clean up
    bot.wait(3000)
    bot.stop_browser()

def not_found(label):
    print(f"Element not found: {label}")

if __name__ == '__main__':
    main()
Running this code, the result will look like this:
Info
This guide was built using the AntiCaptcha service as a reference.
See more details by accessing the AntiCaptcha documentation.