Java "Hello Web Bot"
This tutorial will guide you through the process of creating a simple Java web automation.
Prerequisites
- BotCity Account
- BotCity Studio SDK
- Java 11 or higher
- Maven 3 or higher
Downloading the WebDriver
To be able to work with web automations, we need to use the corresponding WebDriver to communicate with browsers for automation.
In doing so, it requires that the WebDriver for the chosen browser to be installed and available preferrably
in your PATH. If you can't add the necessary WebDriver to your PATH you will be able to inform the driver path
via code in your bot.
Here is a list of supported browsers along with links for you to download the proper WebDriver:
| Browser | WebDriver Download |
|---|---|
| Chrome | ChromeDriver |
| Firefox | GeckoDriver |
| Edge | MSDriverEdge |
Please follow the instructions on the WebDriver website for installation and setup.
Once the desired WebDriver for the Web Browser to be used is installed we can proceed to the next steps.
Creating Your First Project
BotCity offers a template project which includes all dependencies, provides scripts and a source code skeleton. A template is available on Github. Just clone the project in the folder you want to have the source code of your bot:
This template is a Maven Java project that you can import in any IDE.
Import on Eclipse
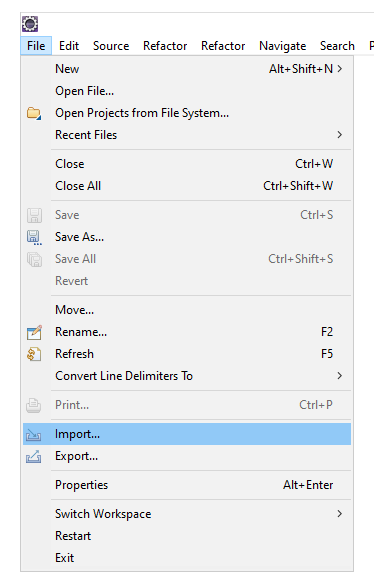
If you are using Eclipse, just click on File and Import:
Choose Maven → Existing Maven Projects:
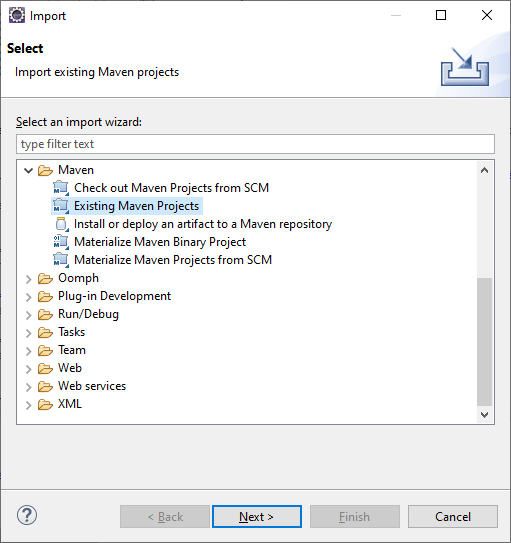
Click on Next
Set the Root Directory to your template bot path, press enter and select /pom.xml:
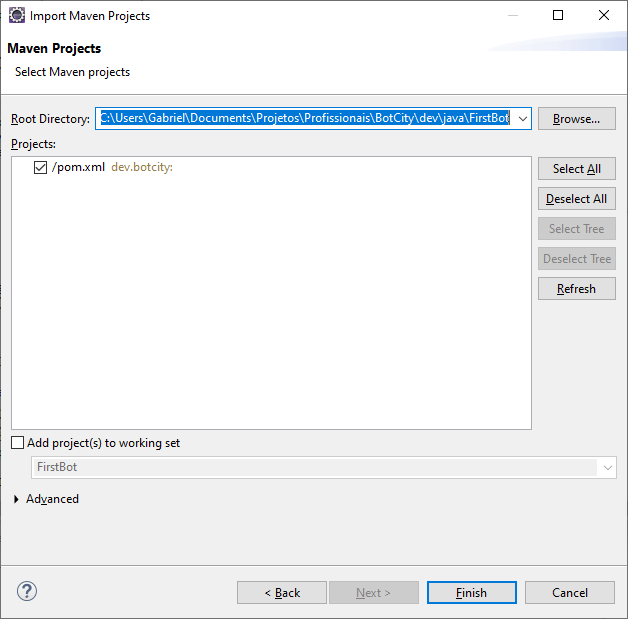
Click on Finish.
Installing the Dependencies
BotCity frameworks are available as Java dependencies in the Nexus repository.
The dependencies will be installed automatically based on the pom.xml configuration.
In the pom.xml of the created project, you will find a configuration similar to this:
<repositories>
    <repository>
        <id>nexus-botcity-public</id>
        <url>https://devtools.botcity.dev:8081/repository/botcity-public/</url>
        <releases>
            <enabled>true</enabled>
        </releases>
        <snapshots>
            <enabled>true</enabled>
        </snapshots>
    </repository>
</repositories>

<dependencies>
    <!-- Your other dependencies -->

    <dependency>
        <groupId>dev.botcity</groupId>
        <artifactId>botcity-framework-core</artifactId>
        <version>1.5.0</version>
    </dependency>

    <dependency>
        <groupId>dev.botcity</groupId>
        <artifactId>maestro-sdk</artifactId>
        <version>2.0.3</version>
    </dependency>
</dependencies>
Updating the Project Dependencies
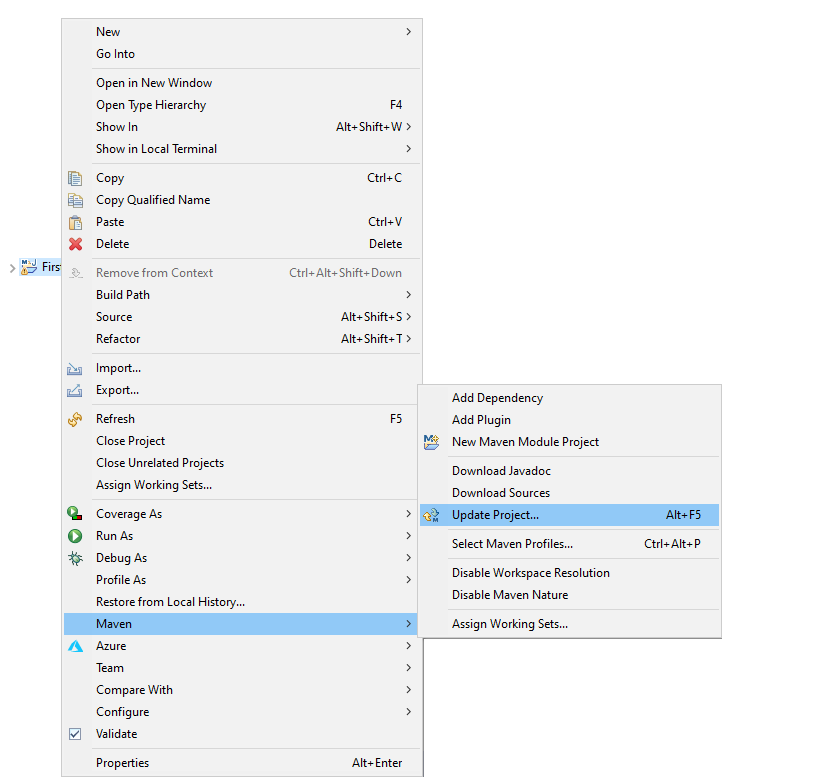
In order to update dependencies recently installed on your local repository, open project menu and select Maven → Update Project:
Exploring the Project
├── LICENSE
├── README.md   <- Simple README file for your bot Project
├── build.bat   <- Batch script to generate the JAR package
├── build.sh    <- Shell script to generate the JAR package
├── pom.xml     <- Maven project file for your bot
└── src
    └── main
        └── java
            └── dev
                └── botcity
                    └── main
                        └── FirstBotWeb.java <- Here is where you will develop
                                             your bot code.
Setting WebDriver Path
As mentioned before, to be able to use the web framework features, it is necessary to configure the WebDriver path of the browser we are using.
If you don't have the WebDriver path added to your PATH, you can manually add the path in your bot code, via the setDriverPath method.
...
public void action(BotExecution botExecution) {

    try {
        // Configure whether to run on headless mode
        setHeadless(false);

        // Changing the default Browser to Firefox
        setBrowser(Browser.FIREFOX);

        // Setting the path of the Firefox WebDriver
        setDriverPath("<path to your WebDriver binary>");

        // Opens the BotCity website
        browse("https://botcity.dev");

    } catch (Exception e) {
        e.printStackTrace();
    } finally {
        // Stop the browser and clean up
        stopBrowser();
    }
}
...
Info
Chrome is set as the default browser. To change the default browser, just select another option through the Browser class.
Testing Your Project Locally
FirstBotWeb.java is a bot skeleton providing the basic methods.
Run this class as a Java application and the BotCity website will open in a new instance of the configured browser.
Here is a screenshot of the expected result:
🌟 Excellent 🌟
You are now ready to start creating automations using the BotCity’s Java Web Framework.
Conclusion
Under this tutorial you learned:
-
The dependencies required to develop automations using BotCity’s Java Web Framework and how to get them installed.
-
How to create new WebBot projects using BotCity’s template.
-
How to install and run your new WebBot project locally.
Have fun automating 🤖
Next Steps
Now it is time to load your project with BotCity Studio and start creating your automations with Computer Vision and all the productivity offered by our tool.