Creating a Credential for Google Cloud Vision
To use the Google Cloud Vision plugin it is necessary to create a credential of a Google service account, then we will show you step by step to get it.
Creating a Service Account
Google service accounts are an essential tool for allowing your applications and services to interact with the features and services provided by the Google Cloud Platform (GCP). They offer a safe and automated means of authentication and authorization, eliminating the need to share personal credentials or passwords.
To create a service account:
- Access the page Service Accounts.
- Select a project or create a new one in Create Project.
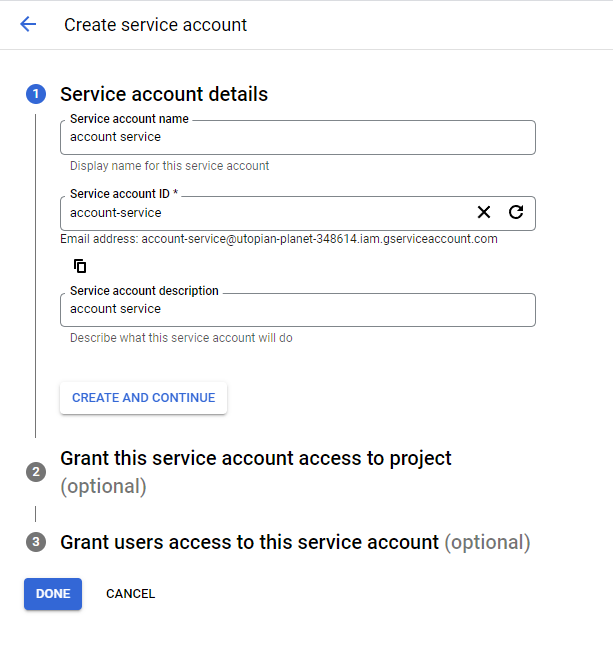
- Click in + Create Service Account.
- Fill in the service account details and click Create and continue.
- Click on Done.
Optional
- Optional: Assign roles to the Service Account to give access to Google Cloud project resources. For more details, see how to grant, change and revoke access to resources.
- Optional: Enter users or groups that can manage and perform actions with this service account. For more details, see how to manage the representation of a service account.
Creating Service Account credentials
To receive your service account credentials:
- Select your service account.
- Click on Keys > Add Key > Create new key.
- Select JSON and click Create.
- Your new key public/private key is generated and the download is done on the machine as a new file. Save the downloaded JSON file as
credentials.jsonin your work directory. - Click Close.
Activating Billing
In addition to having credentials in hand, it is also necessary to enable billing for your project to use the Google Cloud Vision API. However, using it is free for study as long as it does not exceed 1000 requests per month. It is also worth remembering that even at the free level it is necessary to activate billing, as we will show below:
- Access the page Manage billing accounts.
- Click Add billing account.
- Enter the Name of the Cloud Billing account.
- Click Continue.
Note
Depending on the configuration, you will also need to select one of the following options:
- Organization: If you see an Organization drop-down, then you must select an Organization before you can continue.
-
Country: If you are prompted to select a Country, select the country that corresponds with your billing mailing address.
- The country you select affects the payment options available in the next step.
- The currency for your Cloud Billing account is automatically assigned based on the country you select.
- Your country determines what payment methods you can use to pay for your incurred usage costs.
- Choose your country (and currency) carefully, as you can't change these selections later. If you need to edit the country on an existing Cloud Billing account, you'll need to create a new billing account.
- Choose the Google payments profile that will be associated with this Cloud Billing account. A payments profile is shared and used across all Google products (such as Google Workspace, Google Cloud, Google Fi, and more). You can choose an existing Google payments profile, or create a new payments profile. If you choose to create, follow the instructions on the screen to set up your Google Payments profile. For more information about account type, see the Cloud Billing section.
- When you are done setting all the options and details, click Submit and enable billing.
You are now ready to use the BotCity Google Cloud Vision plugin.