Creating Google Credentials
In order to be able to access the resources offered by Google APIs, we must first generate a file of credentials from a Google account.
In a few steps it is possible to get the json file that will be responsible for authenticating our account to Google services.
Creating a Google Cloud Platform project
First we need to create a project that will be used as a base to generate the credentials. It is in this project that we will define the APIs that we will use.
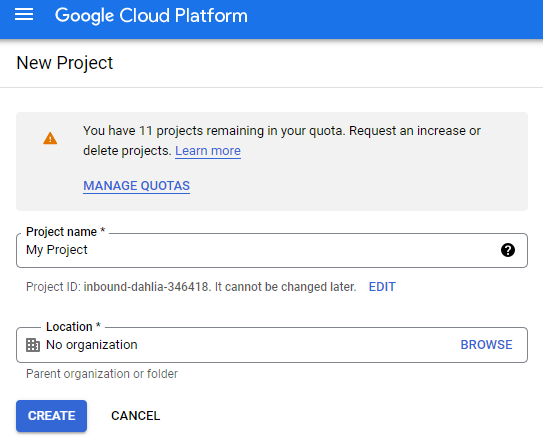
- Open the Google Cloud Platform with the Google account you want to use.
- At the top-left, open the side navigation menu and look for IAM & Admin > Create a Project.
-
Choose a Project Name and select the Location of your project. In the case of plugins, an organization is not necessary.
Note
If you don't see any organization when you click BROWSE, it's probably because you're using a personal account instead of a Google Workspace account.
Some of the features described in the Google Workspace developer documentation are only available to projects associated with an organization, so keep attention on this. For the plugins, the "no organization" option can be used.
- Click Create to complete this step.
Enabling the required APIs
With our project created, let's activate the APIs we want to use.
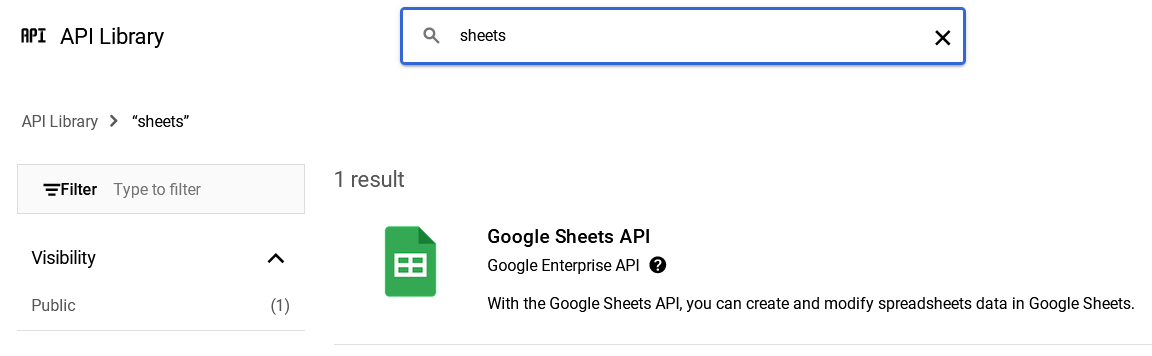
- At the top-left, open the side navigation menu and look for APIs & Services > Library.
-
In the search field, enter the name of the API (1) and press Enter.
-
Tip
- For Google Drive type
Drive API - For Google Sheets type
Sheets API - For Gmail type
Gmail API - For Google Cloud Vision type
Cloud Vision API - For Google Calendar type
Calendar API
- For Google Drive type
-
- In the search results list, select the API and click Enable
Creating OAuth Client ID Credentials
With the API activated, let's create the credentials that we will use to access the features through our application.
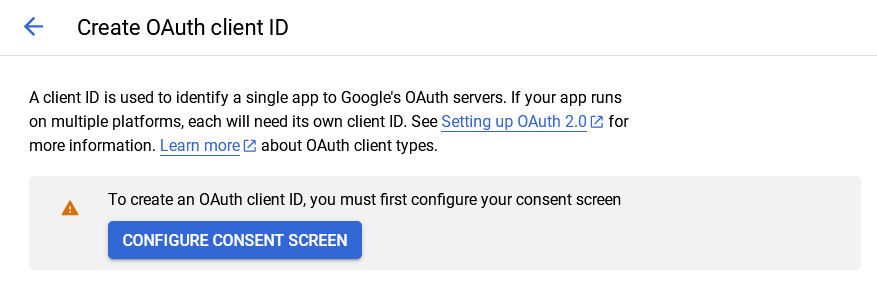
At the left, open the side navigation menu and look for APIs & Services > Credentials. Click on + Create Credentials and select OAuth client ID.
Warning
In some cases, if you are creating credentials for the first time, you may see a message about configuring consent.
Configuring the consent screen for the first time
When creating credentials for the first time, you need to click Configure Consent Screen and follow these steps:
- In User Type, select:
- External if you are using a personal Google account.
- Internal if you are using a Google Workspace account.
- On the OAuth consent screen tab you just need to fill in the required fields and click Save and Continue:
- App name and User support email in the App information section.
- Email address in the Developer contact information section.
- In the Scopes tab it is not necessary to change anything, just click on Save and Continue again.
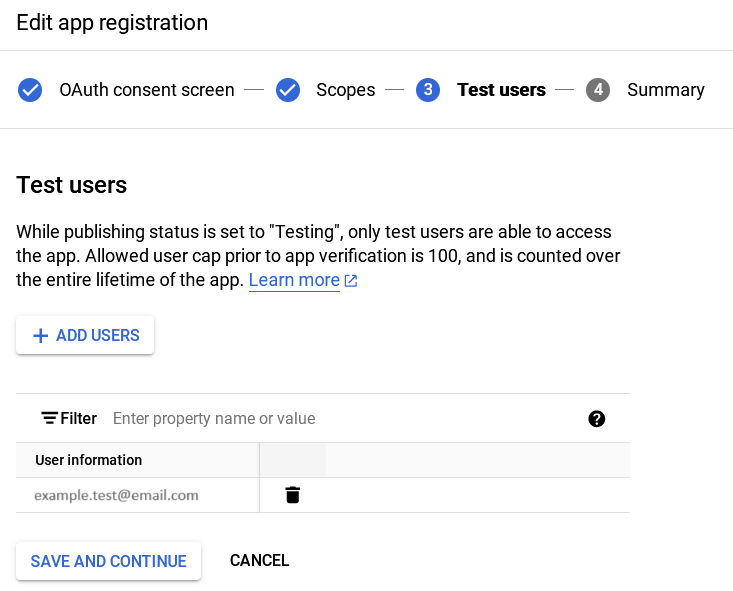
- In the Test Users tab:
- If the user type is External, you will need to add the emails that will have permissions to use the credentials by clicking Add Users, including the email used to create the project.
- If the user type is Internal, you can skip this step.
- In the Summary tab click on Back to Dashboard.
- Open the side navigation menu and look for APIs & Services > Credentials.
- Click on + Create Credentials and select OAuth client ID again.
Creating credentials with consent already configured
With the OAuth consent screen already configured, follow these steps:
- In Application type select Desktop app.
- Choose a Name for the credential.
- Click Create.
After that, the credentials are ready to be used.
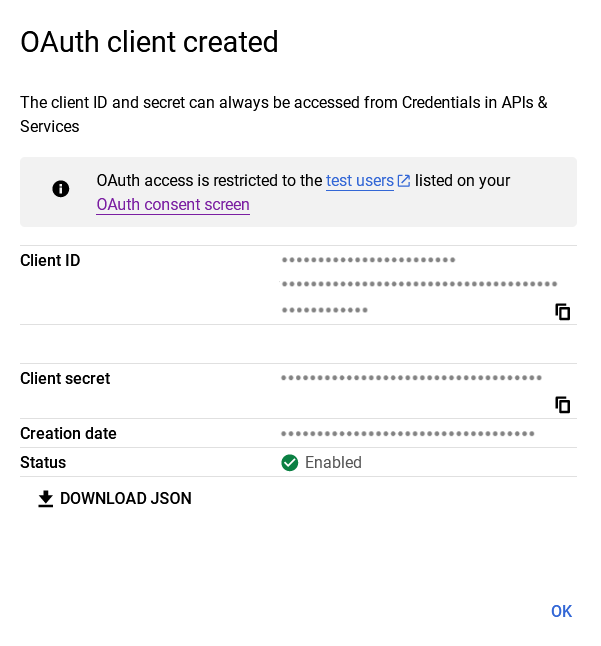
Downloading the OAuth credentials file
- Click on the option Download OAuth client, in the credential line that was created.
- Select DOWNLOAD JSON and save the file wherever you see fit. You can also rename the downloaded file.
- With the file in hand, just pass the path of this file when instantiating the plugin.
Tip
The first time you run a process using the credentials, a tab will open in the browser for you to authenticate your account. Just select the account used to create the credentials and allow access to the resources.
After that, a token file will be generated automatically, making it no longer necessary to repeat this login process.
Google Documentation References
You can get more information about what has been described here through the following links:
- Create a Google Cloud Platform project (details here)
- Activate the Google APIs (details here)
- Create OAuth client ID credentials (details here) and (here)