Creating Microsoft 365 Credentials
In order to be able to access the resources offered by Microsoft 365/Office 365 APIs, we must first generate some credentials from a Microsoft 365 account.
In a few steps it is possible to get the credentials that will be responsible for authenticating our account to Microsoft 365 services.
Creating a project in the Azure portal
First we need to register a application that will be used as a base to generate the credentials. It is in this project that we will define the scopes that we will use.
-
Login at Azure Portal (App Registrations) using your Microsoft 365 account.
-
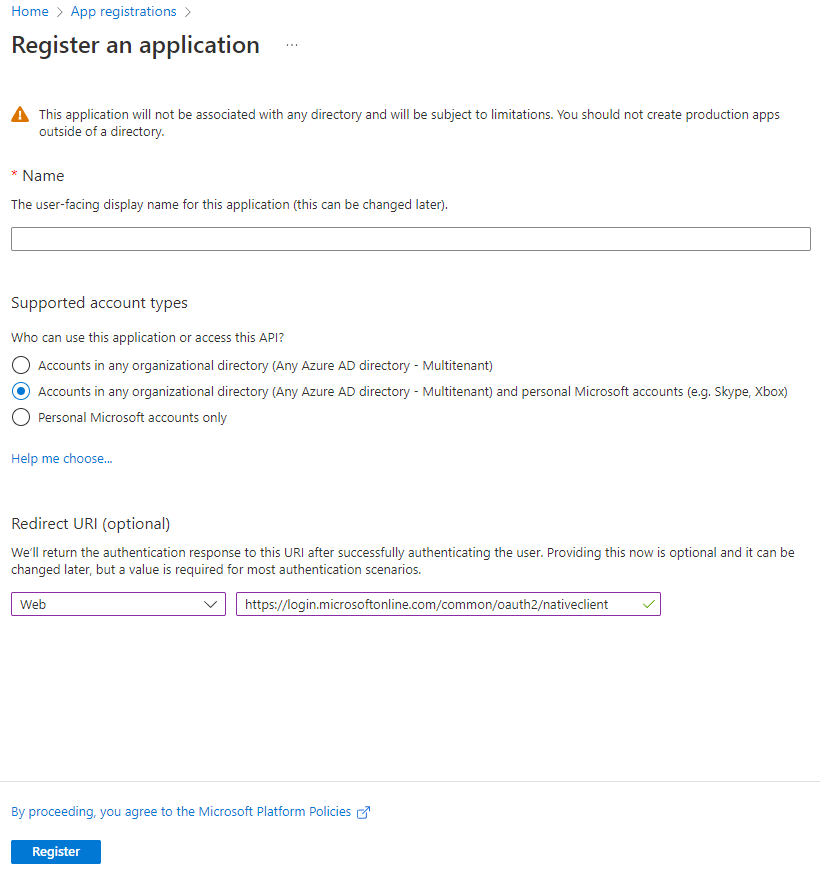
At the top-left, click on + New registration.
-
Set a Name for the app and under Supported Account Types choose
"Accounts in any organizational directory and personal Microsoft accounts (e.g. Skype, Xbox, Outlook.com)". -
Set the Redirect URI to Web and use this link in the text box:
https://login.microsoftonline.com/common/oauth2/nativeclient.
-
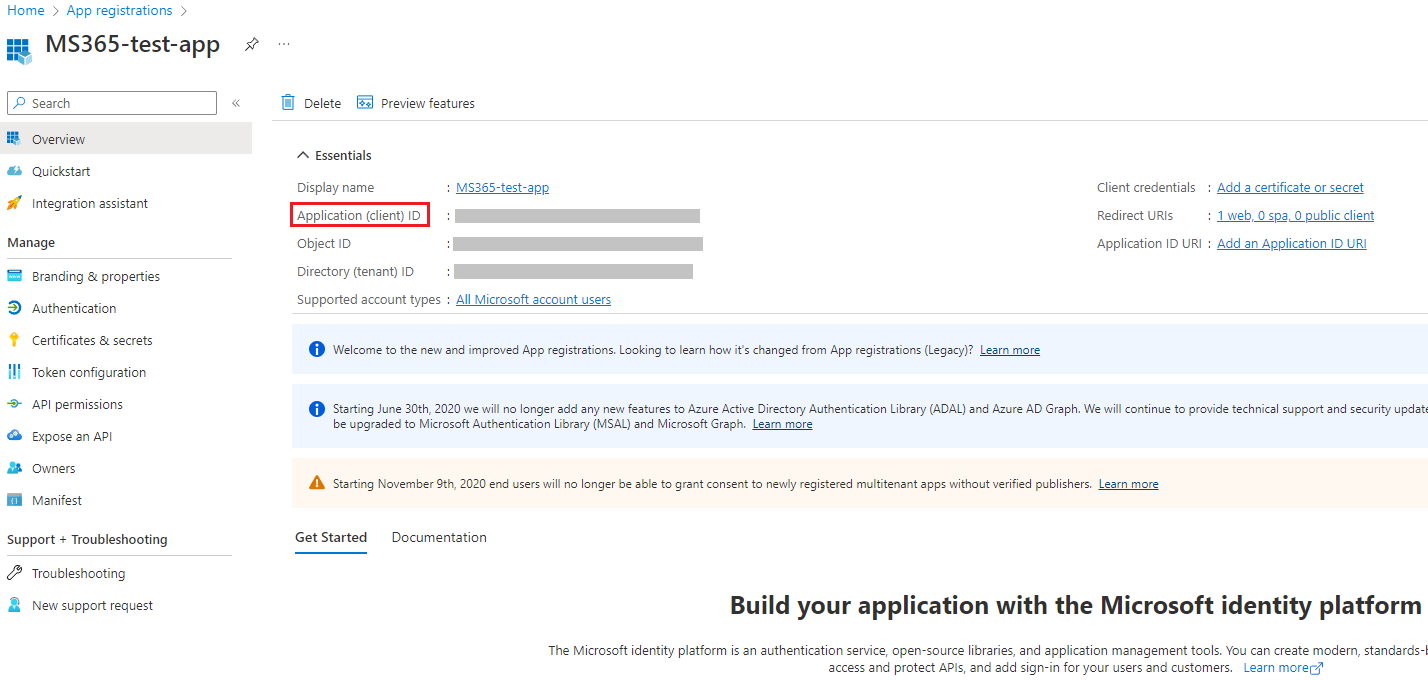
By clicking on Register, an overview of the created project will be displayed.
-
At this point, we need to save the Application (client) ID information. We will need this value to instantiate the plugins.
Creating a new client secret
-
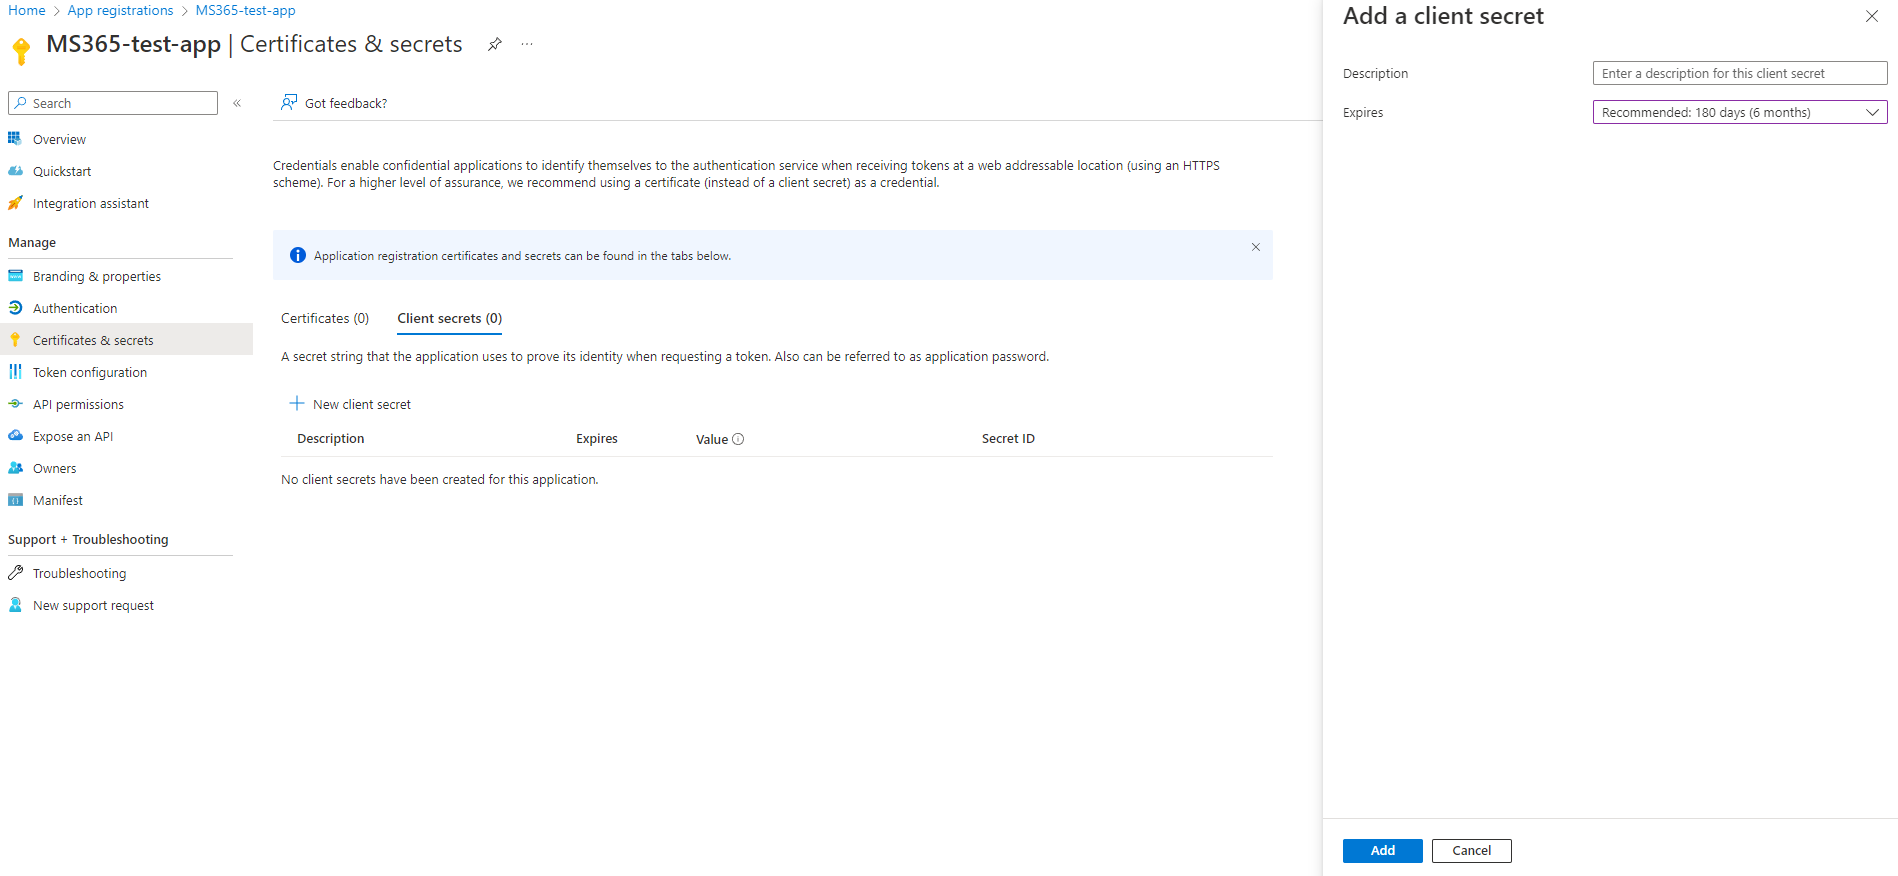
At the top-left menu, click on Certificates & secrets and click to generate a + New client secret.
-
You can set a description and select when this secret will expire.
- After adding a new secret, we need to save the Secret Value information. This is the second value we need to instantiate the plugins.
Setting API permissions
- Under API permissions, we need to configure the scopes that will be used.
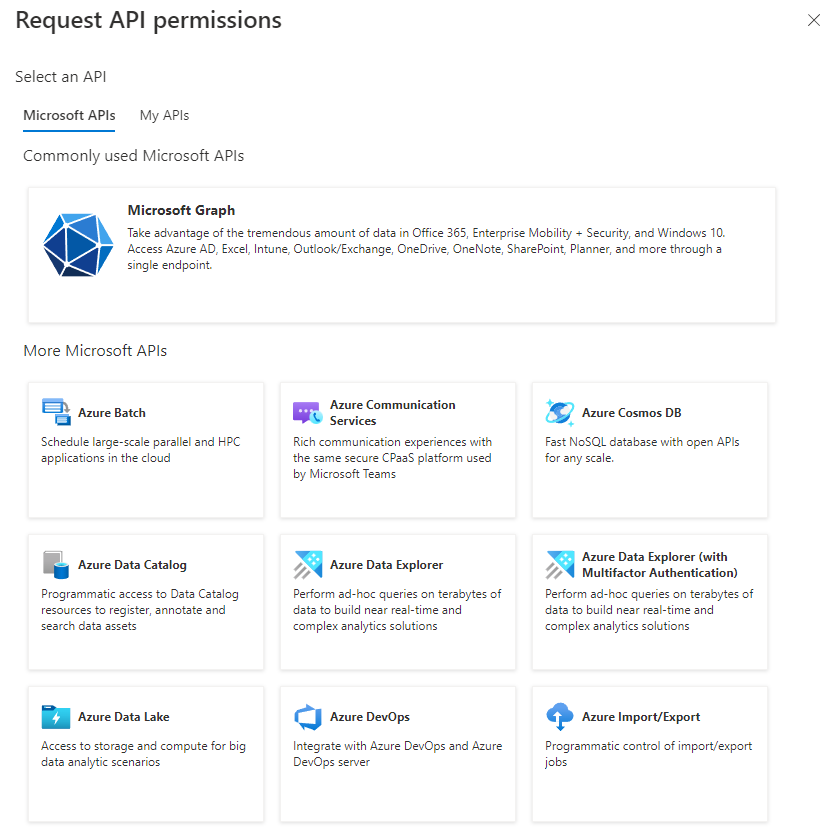
- Click on + Add a permission and select the Microsoft Graph API option.
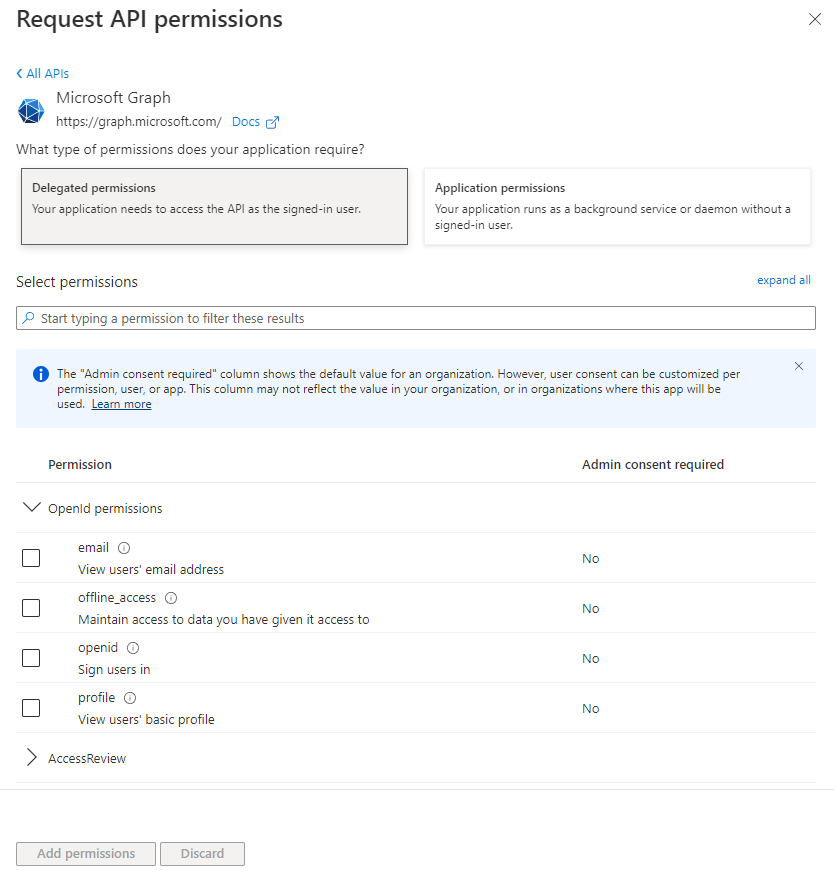
- At this point, we need to select Delegated Permissions and add some permissions.
At this point, you can add whatever permissions you prefer for the services you intend to use.
The table below describes some main scopes:
| Scope | Description | Required for |
|---|---|---|
offline_access |
Maintain acess to data you have given it access to | Required to not need to refresh the token every 1 hour |
User.Read |
Sign in and read user profile | Basic authentication |
Mail.ReadWrite |
Read and write access to user mail | Required to use Outlook service (read and write) |
Mail.Send |
Send mail as a user | Required to use Outlook service (send messages) |
Files.ReadWrite.All |
Manage files and perform operations on Excel spreadsheets | Required to use OneDrive/Excel services |
Sites.ReadWrite.All |
Manage items through Sharepoint sites | Required to use Sharepoint services |
Important
We recommend adding most of the above permissions so that you can use OneDrive, Excel, and Outlook services without having to do this process again later.
However, if you don't want to use all these services, you can also add only the permissions you intend to use.
-
Just search for the permission and check the option box.
-
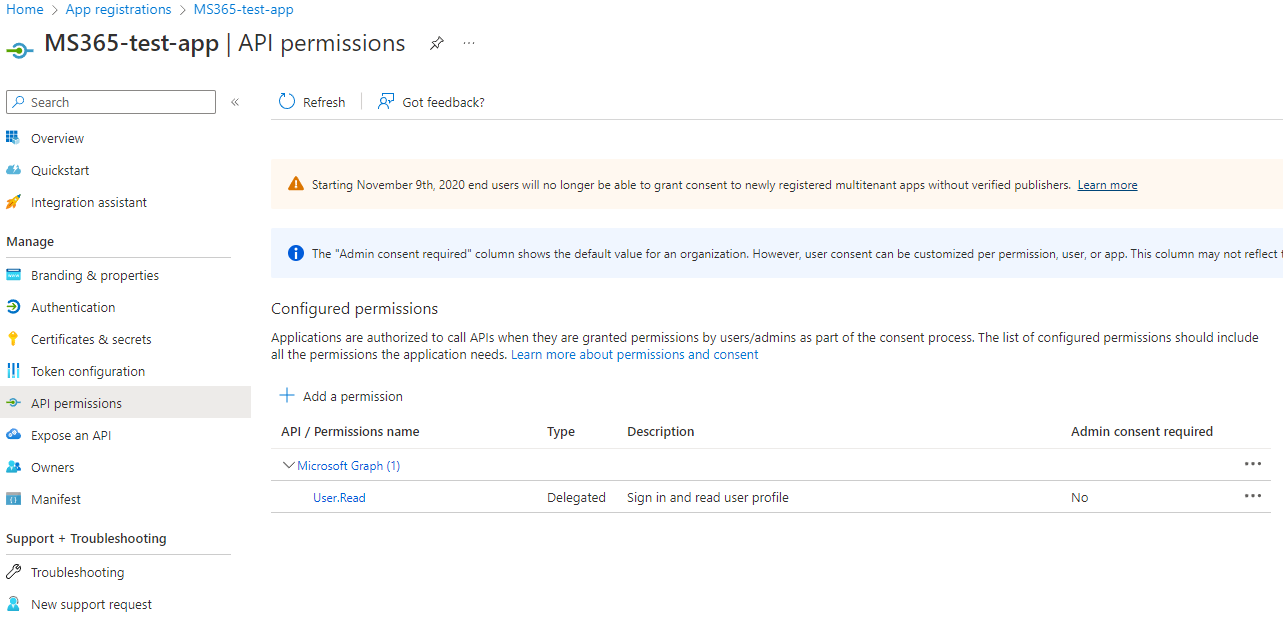
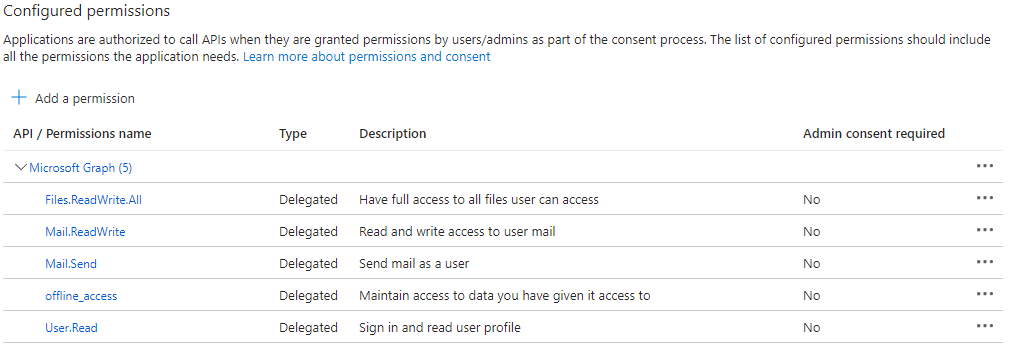
At this point, the permissions list will look like this:
Done! At this moment we already have an application properly created and configured.
We will only need the previously saved Application (client) ID and Secret Value information to complete the authentication process when instantiating the plugins.
