Easy Deploy
With Easy Deploy, in just three steps, you will have your automation ready to be executed by the BotCity Orchestrator.
The Easy Deploy process allows us to create a new automation or update an existing one on the platform.
This process is divided into three steps:
- Creating/updating an automation
- Deploying a bot
- Choosing where to run
Creating a new automation
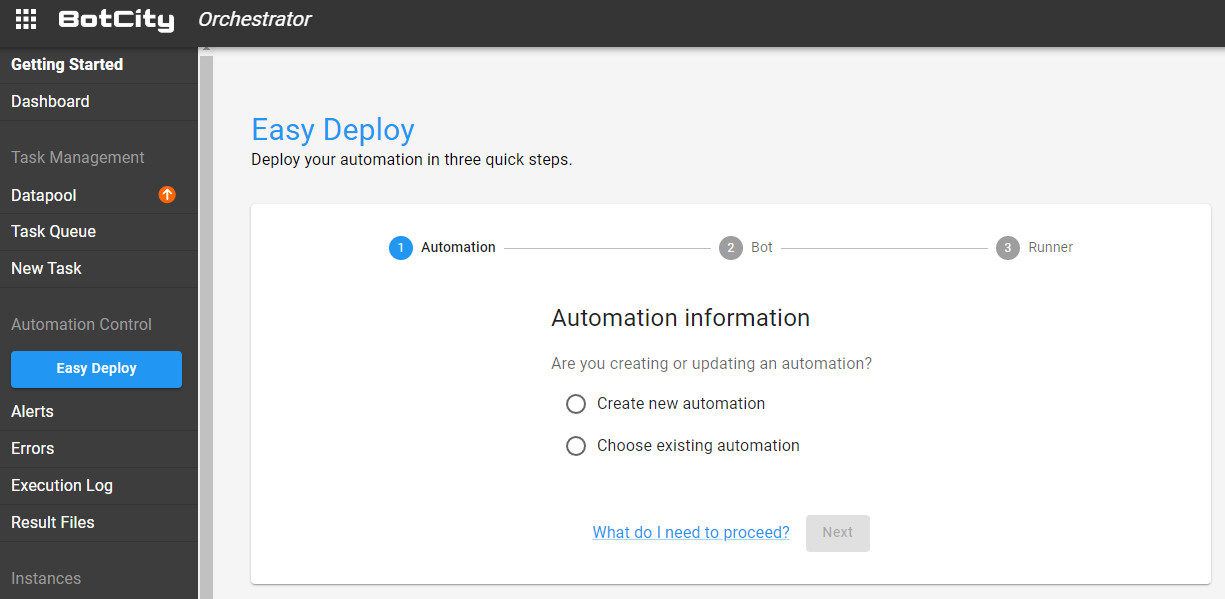
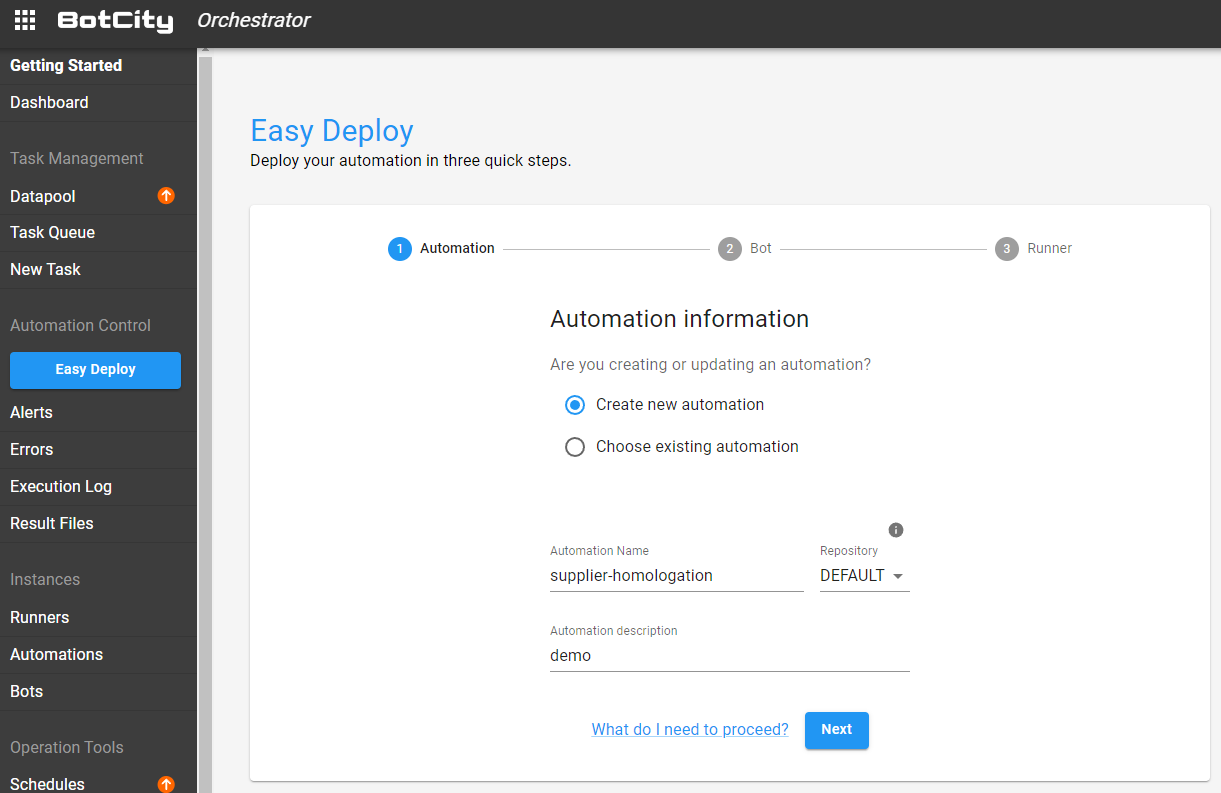
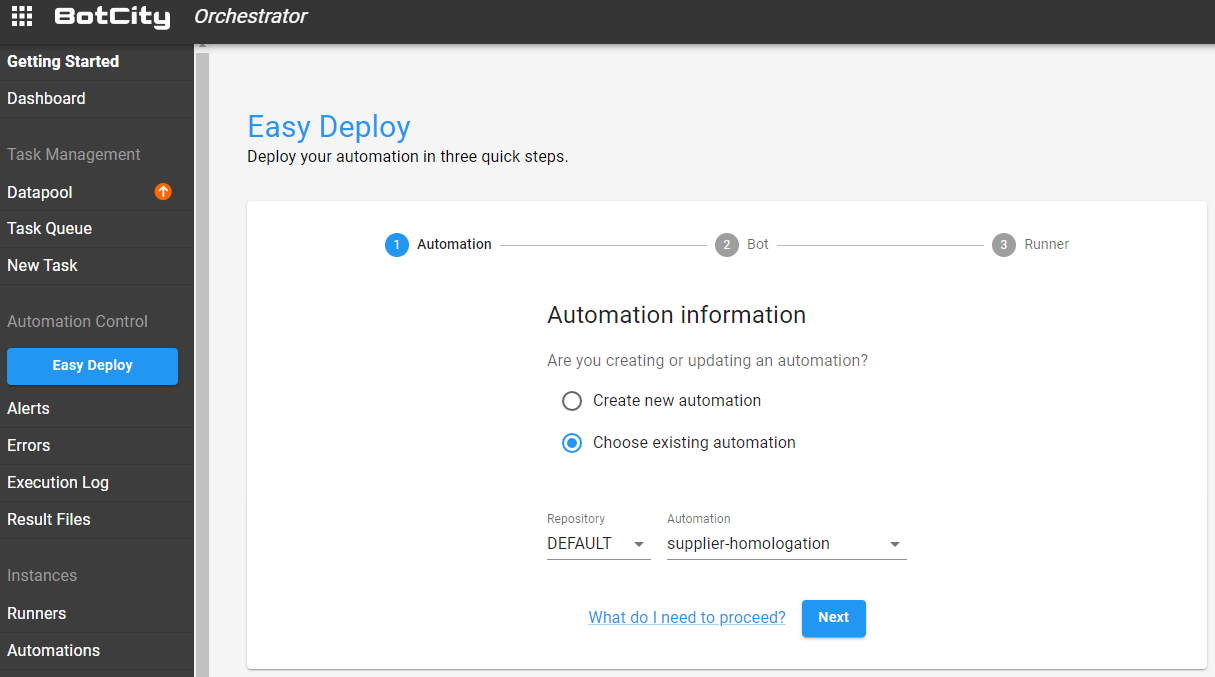
To create an automation from scratch, select the option: Create new automation
First Step - Creating an automation
The first step is to fill in some information about the automation process being created.
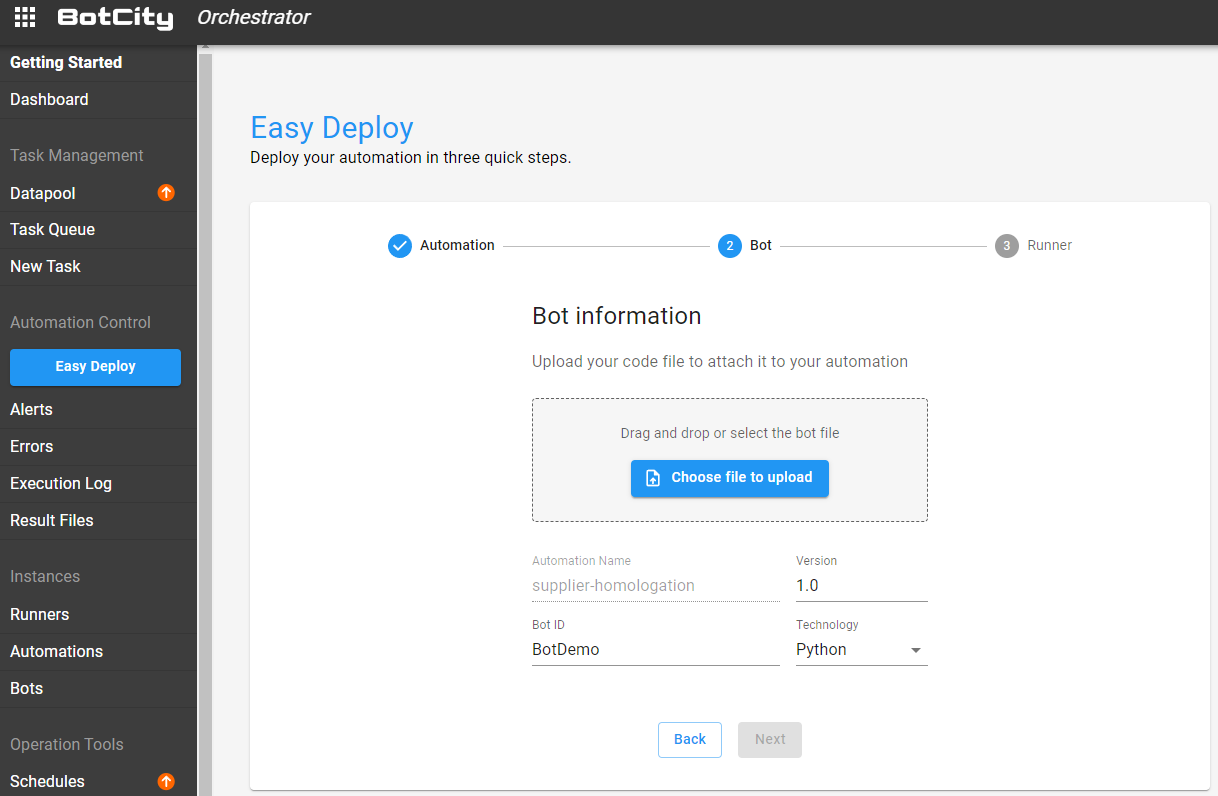
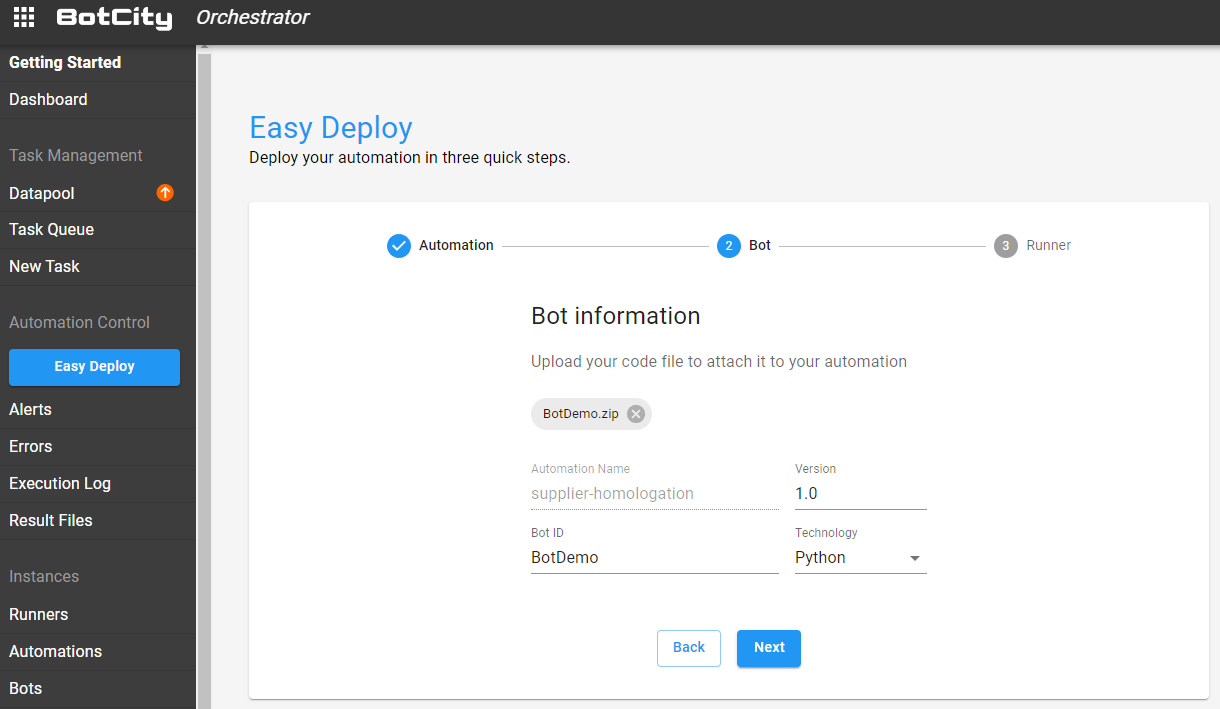
Second Step - Deploying a bot
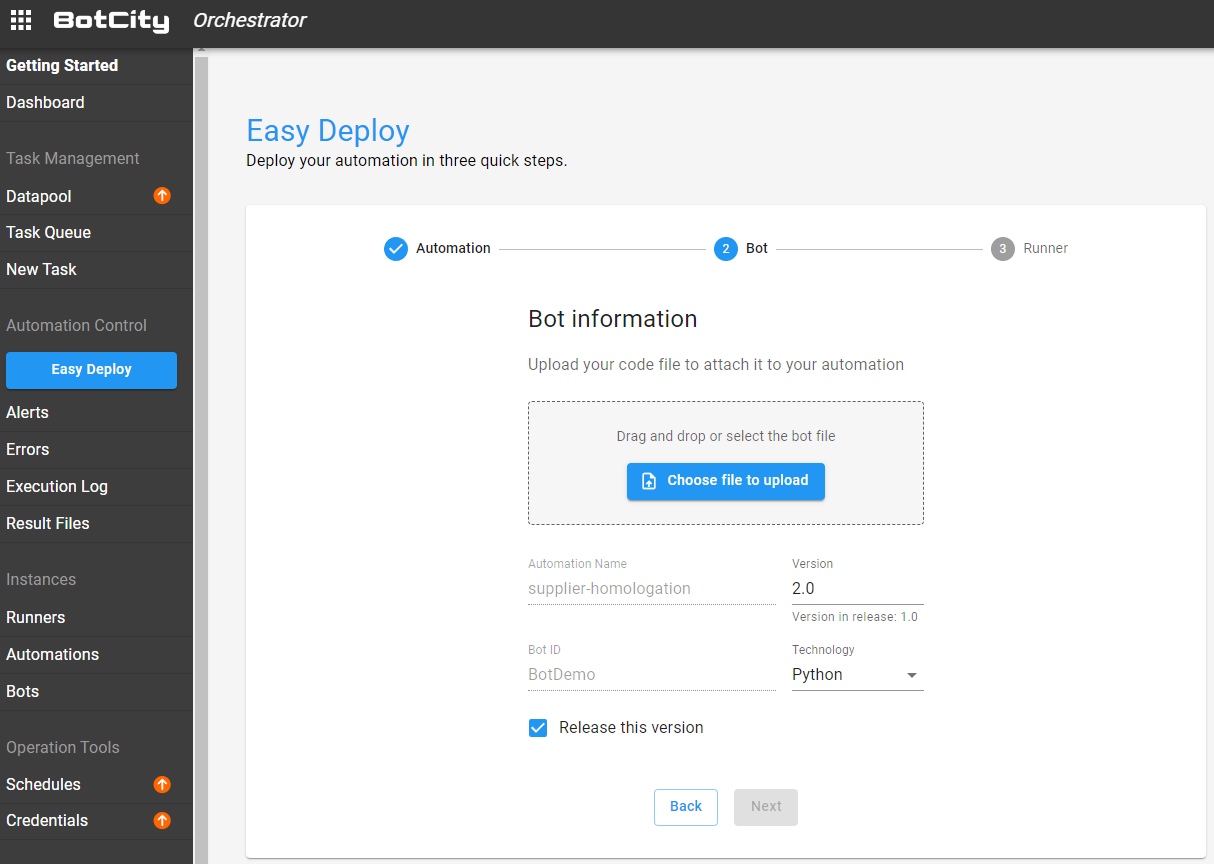
The second step is to fill in the information about your bot. For that, it is necessary that you have already created and done the "build" process of a bot project.
How to create a bot
To manage a bot on the platform, we first need to create a project in the Java, Javascript, or Python structure that will be used to develop the bot.
To create a new bot project, follow the tutorials below:
-
Python
-
Java
-
Javascript
Tip
In addition to template projects, you can also orchestrate your own custom projects.
See more details about orchestrate custom projects.
Building your bot project
To send the bot to the Orchestrator you need to build the project. If you are in Windows run the build.bat file in the root
directory of the project, otherwise run the build.sh file under Linux or macOS.
Java bots
For bots developed in Java, use the generated .jar file in the dist/ folder, if it generates two .jar files use the
file with jar-with-dependencies in the filename.
Python bots
For bots developed in Python, use the generated .zip or .tar.gz file in the dist/ folder.
Javascript bots
For bots developed in Javascript, use a .zip file containing the project files such as the bot.js, resources folder and package.json.
In this step, you will upload the file related to the robot and define the version, the identifier, and the technology being used.
Warning for legacy Python projects
For Python automation, if you are using a legacy project template, the bot identifier must match the id defined when creating the project.
If the auto-generated name is not the same as the ID of the created project, change it so that the identifiers match.
For legacy projects, the bot identifier appears in the name of the generated .tar.gz file being used.
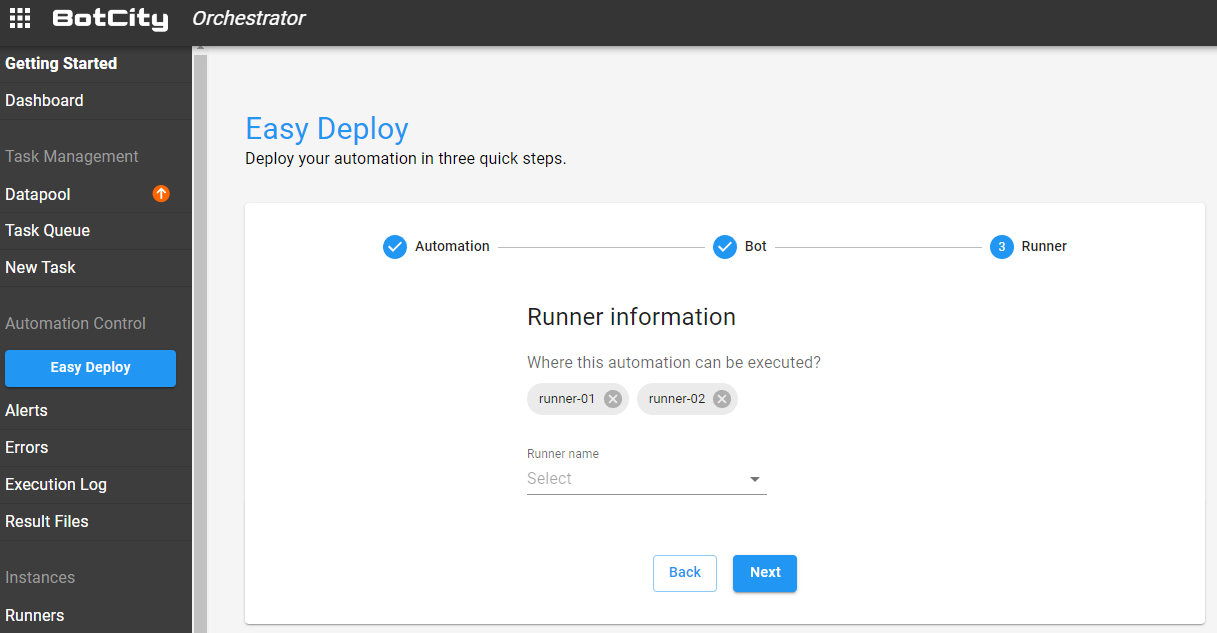
Final Step - Choosing where to run
The third and final step is to define which Runner or Runners will be associated with this automation.
Note
To associate a Runner with automation, it must be properly created and configured on the platform.
See more details on how to create and configure a Runner in the Runners section.
Finishing this step, you will have your automation process associated with your robot and have defined where it will be executed.
Tip
You can see more details on orchestrating a bot step by step using the Easy Deploy functionality by accessing the Orchestrating Your Automation tutorial.
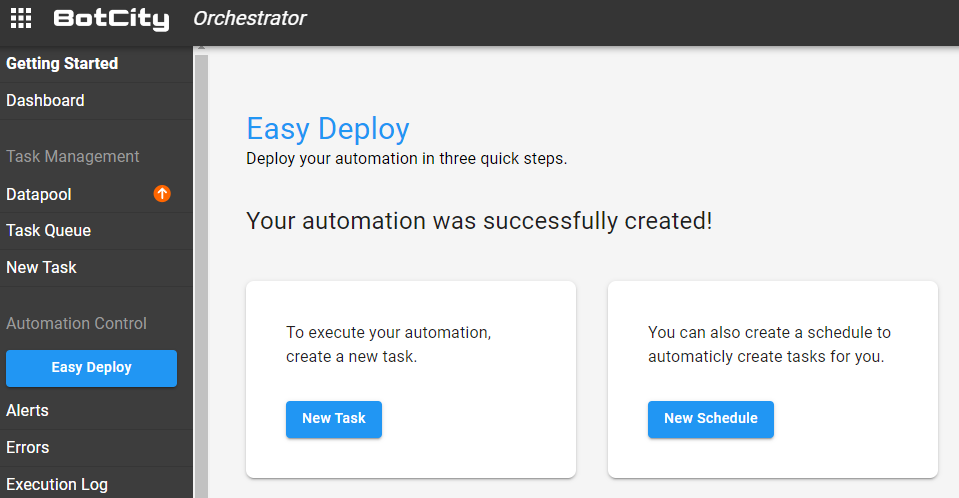
Success 🚀
You now have the option to create a new task or schedule for this automation.
By doing so, a new task will be queued and as soon as the Runners associated with the automation are active, the execution will start automatically.
Updating an existing automation
If you need to update an automation that already exists on the platform, select the option: Choose existing automation
After selecting an existing automation, you can edit the robot and the Runners linked to this process.
Updating the robot
On the screen containing the robot's information, you can update the current version being used or upload a new version.
Just upload the robot file and enter the corresponding version.
If you keep the same version already being used, this new file will overwrite the previously used file.
Tip
If you leave the Release this version option checked, this will be the version used in the next executions of the automation.
Updating Runners
At this stage, you will be able to edit the Runners that are linked to the automation process.
