Registro de Ejecución
Ir a RegistrosLos registros de ejecución son una forma muy poderosa de rastrear la ejecución de su automatización y recopilar métricas.
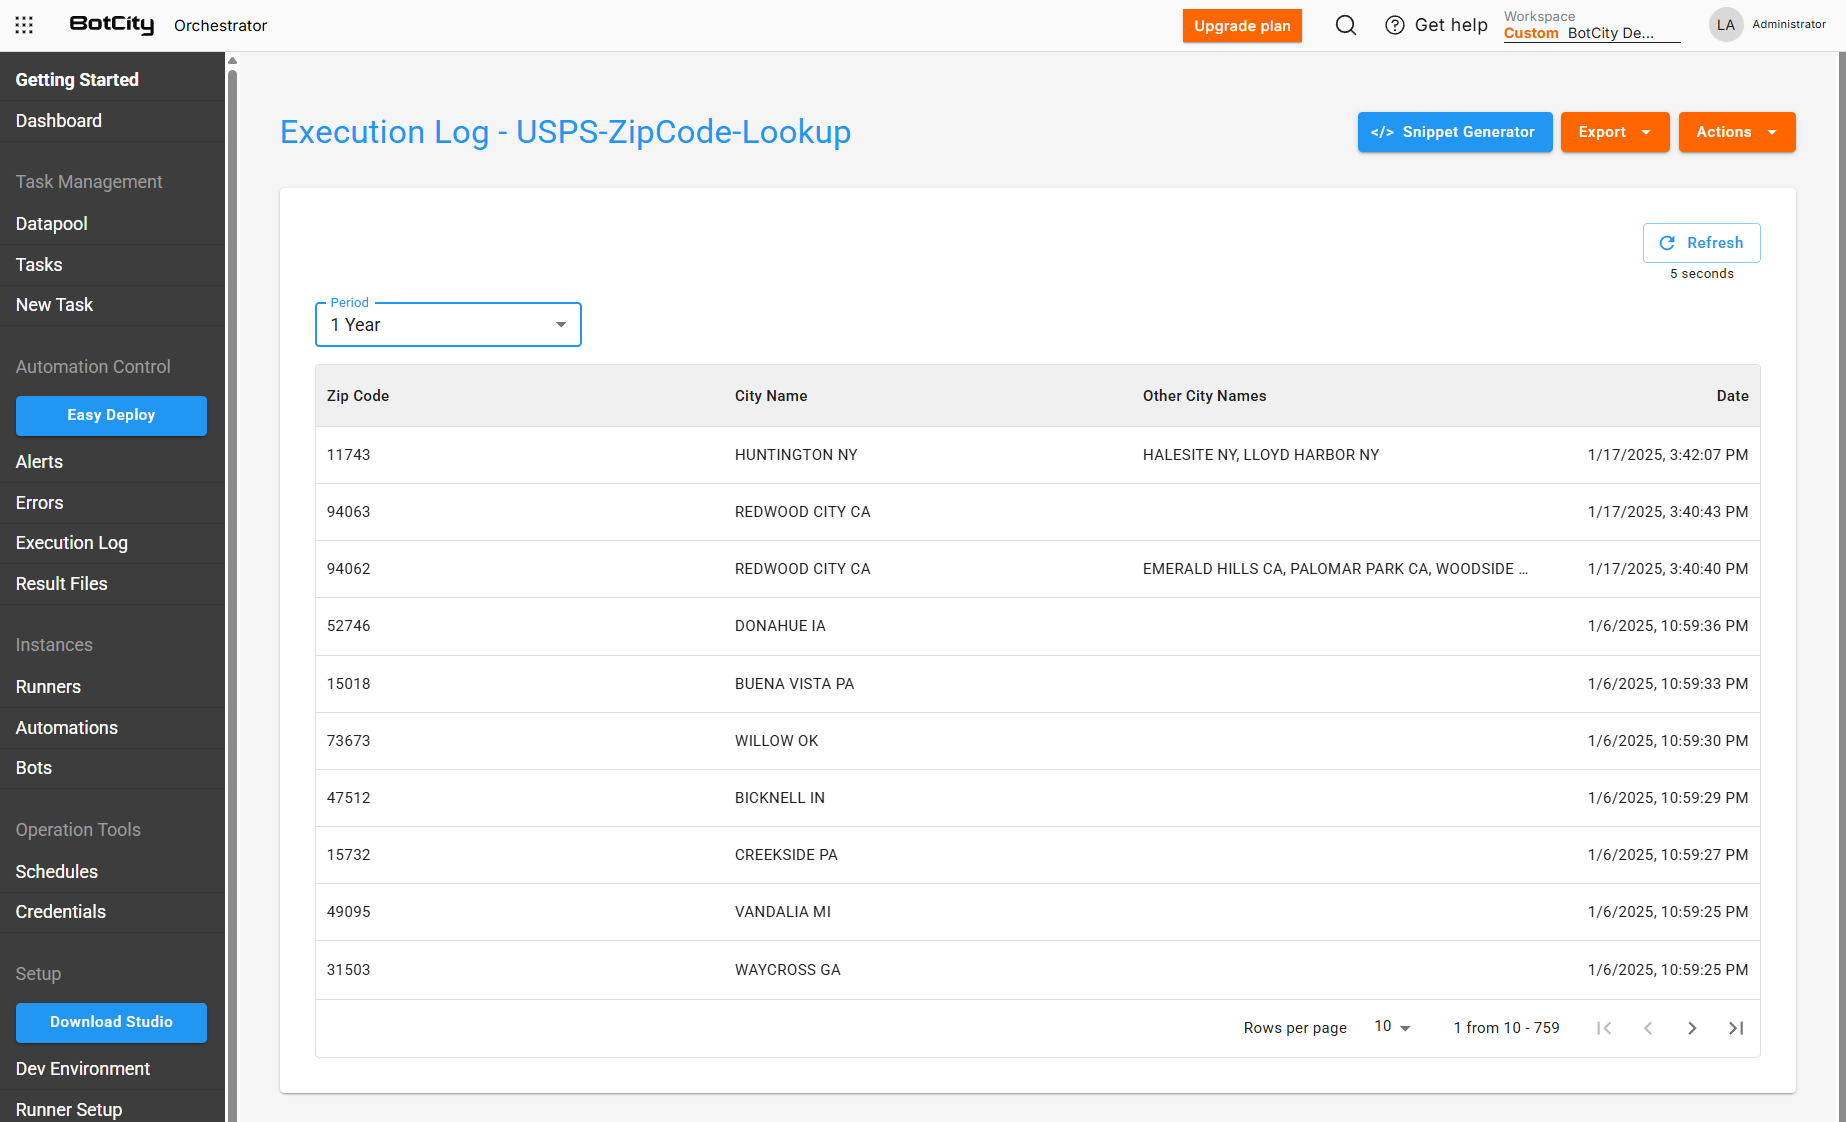
Los registros están disponibles para su visualización y descarga a través del menú Registro de Ejecución.
Al seleccionar un registro de ejecución para verlo, puede filtrar por fecha y descargar de inmediato un archivo CSV, JSON o Excel con sus datos.
Tip
Explore  para ver ejemplos de código que facilitan las manipulaciones de registros, acceda y aprenda cómo crear un nuevo registro de entrada de fragmentos, obtener datos de registro, descargar como CSV y eliminar un registro completo mediante código.
Los fragmentos generados están disponibles en los lenguajes Python, Java, JavaScript y TypeScript.
Importante
Para ver los ejemplos de código, primero deberá crear una estructura de registro.
Crear un registro de ejecución usando el BotCity Maestro
A través de la interfaz del BotCity Maestro, puede crear y manipular registros de ejecución personalizados para cada una de sus necesidades.
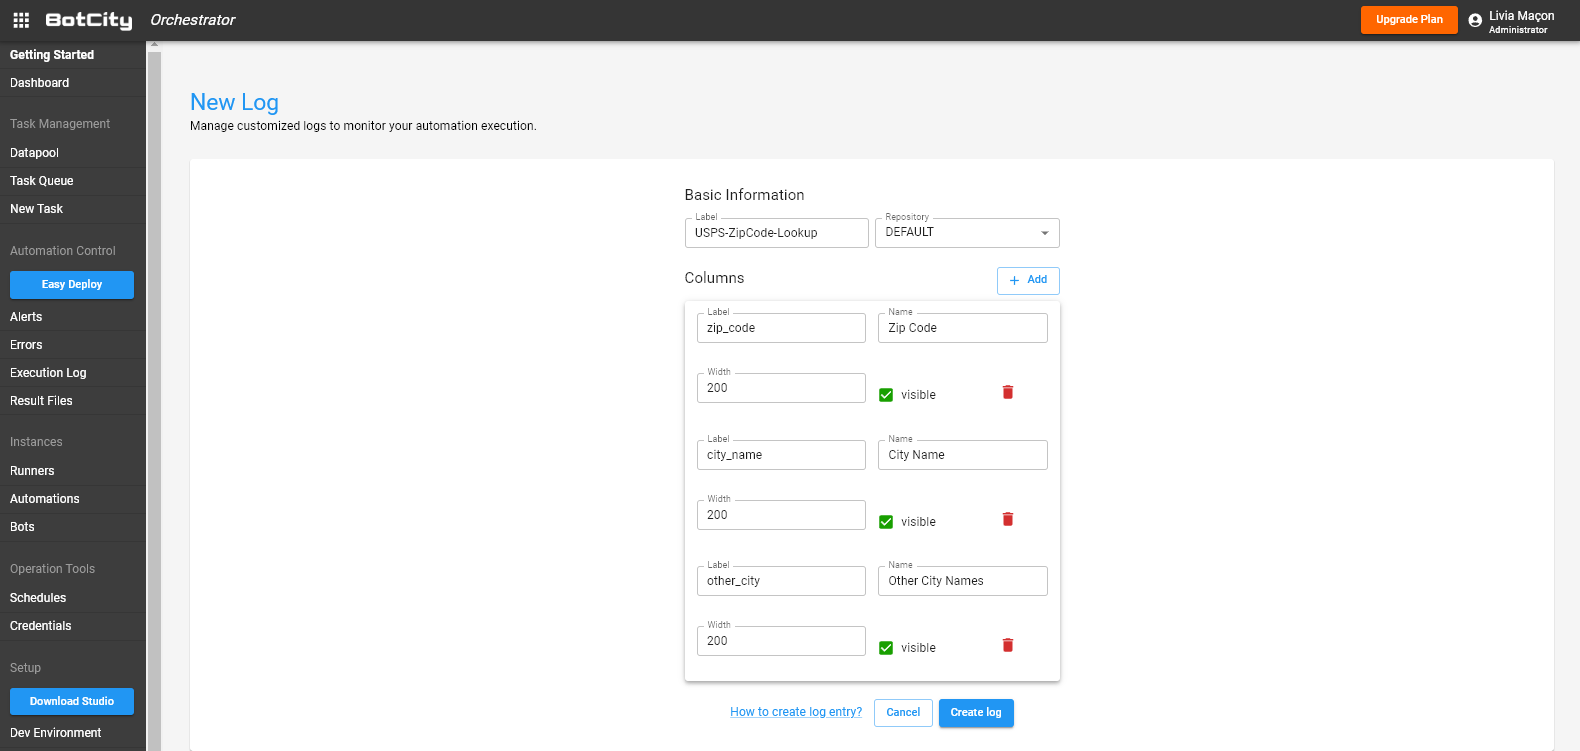
Al hacer clic en el botón Nuevo Registro, se le llevará a la pantalla de creación de registro donde puede definir la etiqueta del registro, que es el ID único que se utilizará al interactuar con este registro a través del SDK o la API del BotCity Maestro, así como las columnas.
Puede crear tantos registros como desee para organizar mejor sus datos y la gestión de la automatización.
Cómo crear una entrada de registro de ejecución usando el SDK del Maestro
Puede crear fácilmente una nueva entrada de registro utilizando el SDK del Maestro en su código de automatización.
Warning
Para poder crear una nueva entrada de registro mediante código, la estructura del registro debe haber sido creada previamente en Maestro.
Instalación
Si aún no tiene instalada la dependencia, simplemente siga estas instrucciones:
Important
Además de la instalación, recuerde incluir la dependencia en el archivo requirements.txt del bot.
<repositories>
    <repository>
        <id>nexus-botcity-public</id>
        <url>https://devtools.botcity.dev:8081/repository/botcity-public/</url>
        <releases>
            <enabled>true</enabled>
        </releases>
        <snapshots>
            <enabled>true</enabled>
        </snapshots>
    </repository>
</repositories>

<dependencies>
    <!-- Your other dependencies -->
    <dependency>
        <groupId>dev.botcity</groupId>
        <artifactId>maestro-sdk</artifactId>
        <version>2.0.3</version>
    </dependency>
</dependencies>
Importar el SDK
Después de la instalación, importe la dependencia e instancie el SDK del Maestro:
# Import for integration with BotCity Maestro SDK
from botcity.maestro import *

# Disable errors if we are not connected to Maestro
BotMaestroSDK.RAISE_NOT_CONNECTED = False

# Instantiating the Maestro SDK
maestro = BotMaestroSDK.from_sys_args()
# Fetching the details of the current task being executed
execution = maestro.get_execution()
// Import for integration with BotCity Maestro SDK
const { BotMaestroSdk } = require('@botcity/botcity-maestro-sdk')

// Getting parameters passed by Runner
const args = process.argv.slice(2)
const [server, taskid, token] = args

// Login with information from the Dev. Environment page
const maestro = new BotMaestroSdk()
maestro.login("YOUR_SERVER_HERE", "YOUR_USER_HERE", "YOUR_KEY_HERE")

// Fetching the details of the current task being executed
const executionTask = await maestro.getTask(taskid)
// Import for integration with BotCity Maestro SDK
import { BotMaestroSdk } from '@botcity/botcity-maestro-sdk'

// Getting parameters passed by Runner
const args = process.argv.slice(2)
const [server, taskid, token] = args

// Login with information from the Dev. Environment page
const maestro: BotMaestroSdk = new BotMaestroSdk()
maestro.login("YOUR_SERVER_HERE", "YOUR_USER_HERE", "YOUR_KEY_HERE")

// Fetching the details of the current task being executed
const executionTask: Task = await maestro.getTask(taskid)
// Import for integration with BotCity Maestro SDK
using Dev.BotCity;
using Dev.BotCity.MaestroSdk.Model.Execution;

// Instantiating the Maestro SDK
BotMaestroSDK maestro = BotMaestroSDK.FromSysArgs();
// Fetching the details of the current task being executed
Execution execution = await maestro.GetExecutionAsync(maestro.GetTaskId());
Crear una nueva entrada de registro
# Importing datetime library to define the timestamp of the execution
import datetime
# Creating a new log entry in the BotCity Maestro
maestro.new_log_entry(
    activity_label="logLabel",
    values = {
        "timestamp": datetime.datetime.now().strftime("%Y-%m-%d_%H-%M"),
        "records": "10",
        "status": "SUCCESS"
    }
)
// Defining the day and time of execution
String timestamp = new SimpleDateFormat("yyyy-MM-dd_HH-mm").format(new java.util.Date());

// Creating a new log entry in the BotCity Maestro
Map<String,Object> values = new HashMap<String,Object>();
values.put("timestamp", timestamp);
values.put("records", "10");
values.put("status", "SUCCESS");

maestro.newLogEntry("logLabel", values);
Código completo
from botcity.core import DesktopBot
from botcity.maestro import *

# Importing datetime library to define the timestamp of the execution
import datetime

# Disable errors if we are not connected to Maestro
BotMaestroSDK.RAISE_NOT_CONNECTED = False

def main():
    maestro = BotMaestroSDK.from_sys_args()
    execution = maestro.get_execution()

    # Creating a new log entry in the BotCity Maestro
    maestro.new_log_entry(
        activity_label="ResultsLog",
        values = {
            "timestamp": datetime.datetime.now().strftime("%Y-%m-%d_%H-%M"),
            "records": "10",
            "status": "SUCCESS"
        }
    )

    bot = DesktopBot()
    # Implement here your logic...
    ...

def not_found(label):
    print(f"Element not found: {label}")

if __name__ == '__main__':
    main()
import dev.botcity.framework.bot.DesktopBot;
import dev.botcity.maestro_sdk.BotExecutor;
import dev.botcity.maestro_sdk.BotMaestroSDK;
import dev.botcity.maestro_sdk.model.AlertType;
import dev.botcity.maestro_sdk.runner.BotExecution;
import dev.botcity.maestro_sdk.runner.RunnableAgent;

public class FirstBot extends DesktopBot implements RunnableAgent
{
    public FirstBot() {
        try {
            setResourceClassLoader(this.getClass().getClassLoader());
        } catch(Exception e) {
            e.printStackTrace();
        }
    }

    @Override
    public void action(BotExecution botExecution) {

        try {
            BotMaestroSDK maestro = new BotMaestroSDK();
            maestro.login(botExecution);

            // Defining the day and time of execution
            String timestamp = new SimpleDateFormat("yyyy-MM-dd_HH-mm").format(new java.util.Date());

            // Creating a new log entry in the BotCity Maestro
            Map<String,Object> values = new HashMap<String,Object>();
            values.put("timestamp", timestamp);
            values.put("records", "10");
            values.put("status", "SUCCESS");

            maestro.newLogEntry("ResultsLog", values);

            // Implement here your logic...
            ...

        } catch(Exception e) {
            e.printStackTrace();
        }
    }

    private void notFound(String label) {
        System.out.println("Element not found: "+label);
    }

    public static void main(String[] args) {
        BotExecutor.run(new FirstBot(), args);
    }
}
const main = async () => {
    const { BotMaestroSdk } = require('@botcity/botcity-maestro-sdk')

    const args = process.argv.slice(2)
    const [server, taskid, token] = args

    const maestro = new BotMaestroSdk()
    maestro.login("YOUR_SERVER_HERE", "YOUR_USER_HERE", "YOUR_KEY_HERE")

    const executionTask = await maestro.getTask(taskid)

    // Creating a new log entry in the BotCity Maestro
    await maestro.logEntry(
        "ResultsLog",
        {
            timestamp: new Date().toISOString(),
            records: "10",
            status: "SUCCESS"
        }
    )
}

main()
const main = async () => {
    import { BotMaestroSdk } from '@botcity/botcity-maestro-sdk'

    const args = process.argv.slice(2)
    const [server, taskid, token] = args

    const maestro: BotMaestroSdk = new BotMaestroSdk()
    maestro.login("YOUR_SERVER_HERE", "YOUR_USER_HERE", "YOUR_KEY_HERE")

    const executionTask: Task = await maestro.getTask(taskid)

    // Creating a new log entry in the BotCity Maestro
    await maestro.logEntry(
        "ResultsLog",
        {
            timestamp: new Date().toISOString(),
            records: "10",
            status: "SUCCESS"
        }
    )
}

main()
using Dev.BotCity.MaestroSdk.Model.AutomationTask;
using Dev.BotCity.MaestroSdk.Model.Execution;
using System;
using System.Threading.Tasks;

namespace FirstBot
{
    class Program
    {
        static async Task Main(string[] args)
        {
            BotMaestroSDK maestro = BotMaestroSDK.FromSysArgs();
            Execution execution = await maestro.GetExecutionAsync(maestro.GetTaskId());

            Console.WriteLine("Task ID is: " + execution.TaskId);
            Console.WriteLine("Task Parameters are: " + string.Join(", ", execution.Parameters));

            // Creating a new log entry in the BotCity Maestro
            var newEntry = new Dictionary<string, object>
            {
                { "timestamp", DateTime.Now.ToString("yyyy-MM-dd_HH-mm")},
                { "records", "10"},
                { "status", "SUCCESS" },
            };

            await maestro.NewLogEntryAsync("ResultsLog", newEntry);

            // Implement here your logic...
        }
    }
}
Tip
Vea las otras operaciones que podemos hacer con registros utilizando el SDK del BotCity Maestro y la API del BotCity Maestro.


